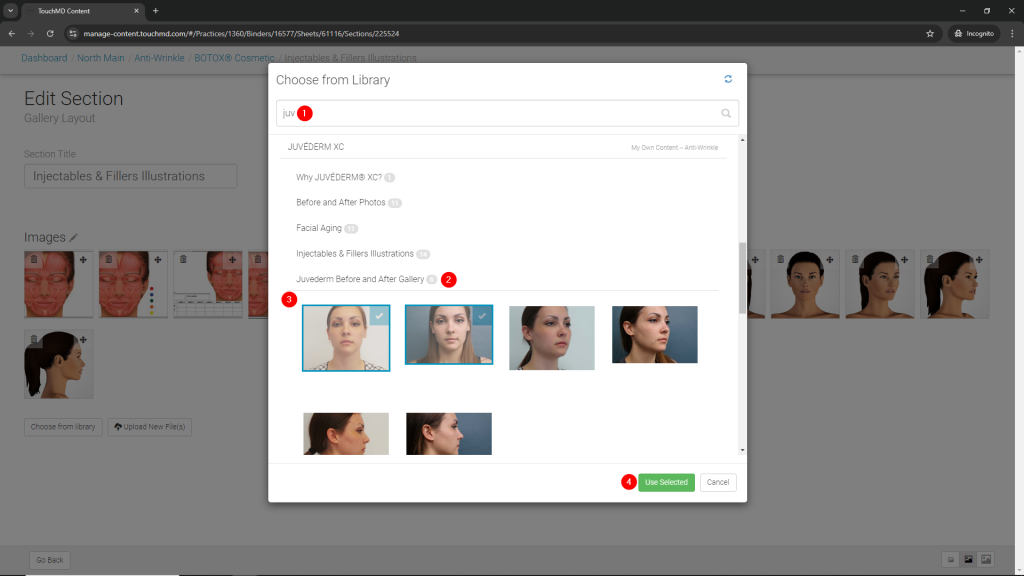
At times, it may be needed to copy an image(s) from one Grouped Gallery or Gallery to another. This article discusses how to do so.
Grouped Gallery:
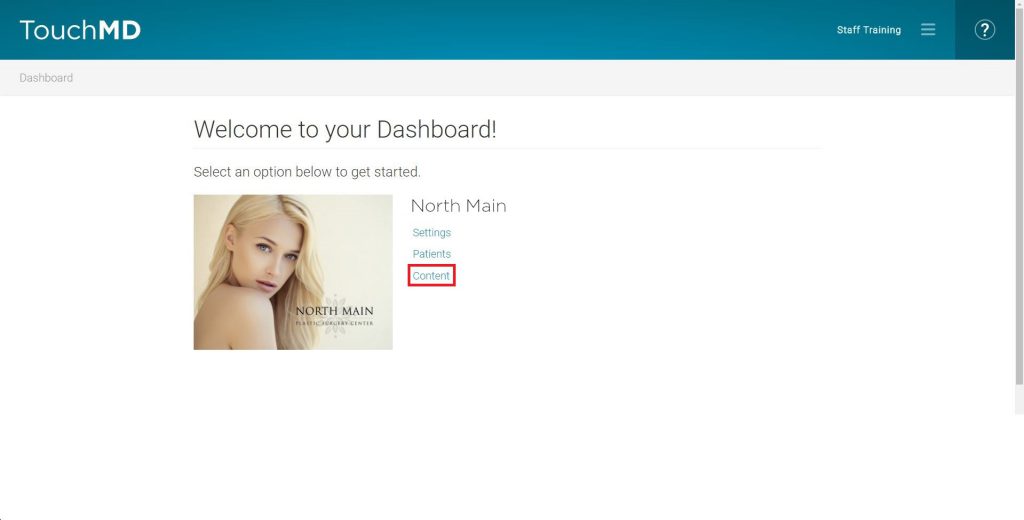
- Log onto dashboard.touchmd.com and select “Content”
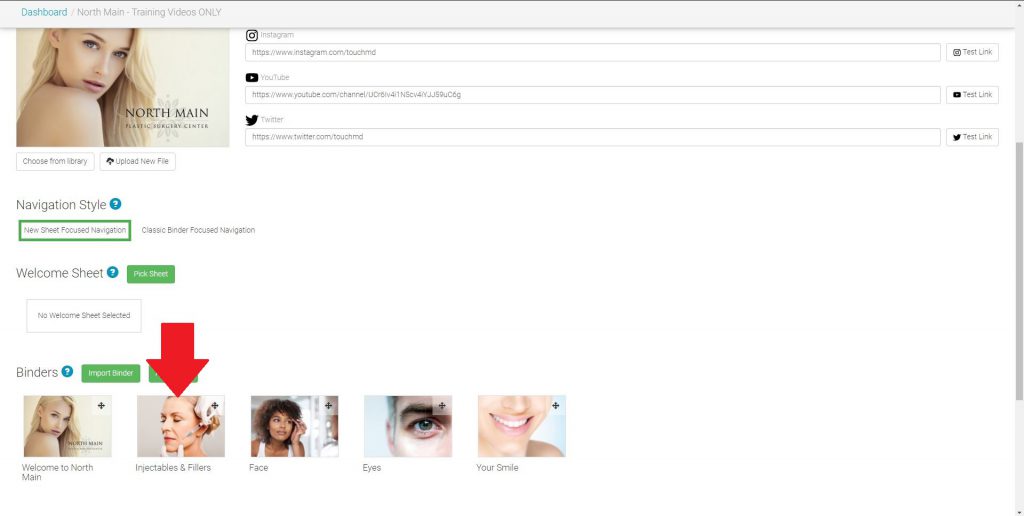
- Select the desired Binder where you would like to add the image(s) to i.e., “Injectables and Fillers”
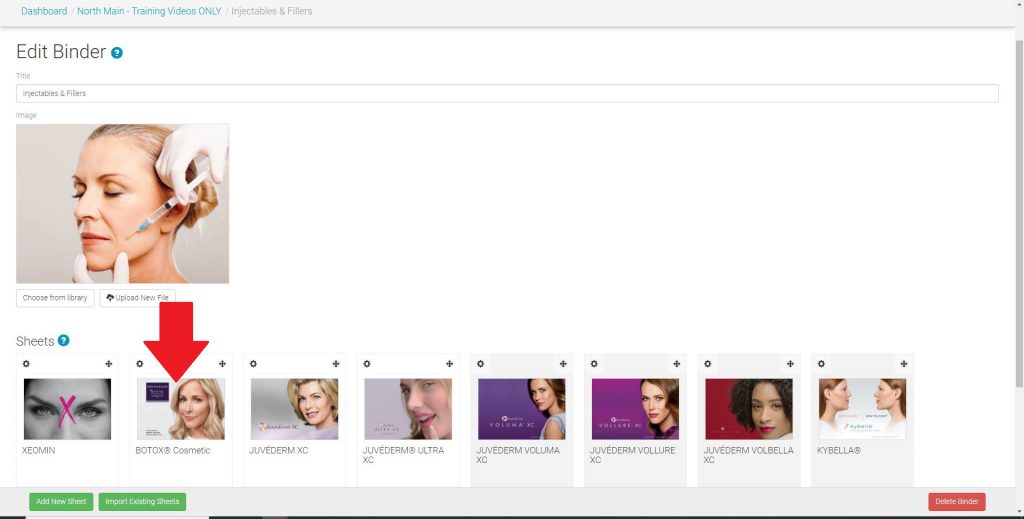
- Select the desired Sheet where you would like to add the image(s) to i.e., “Botox Cosmetic”
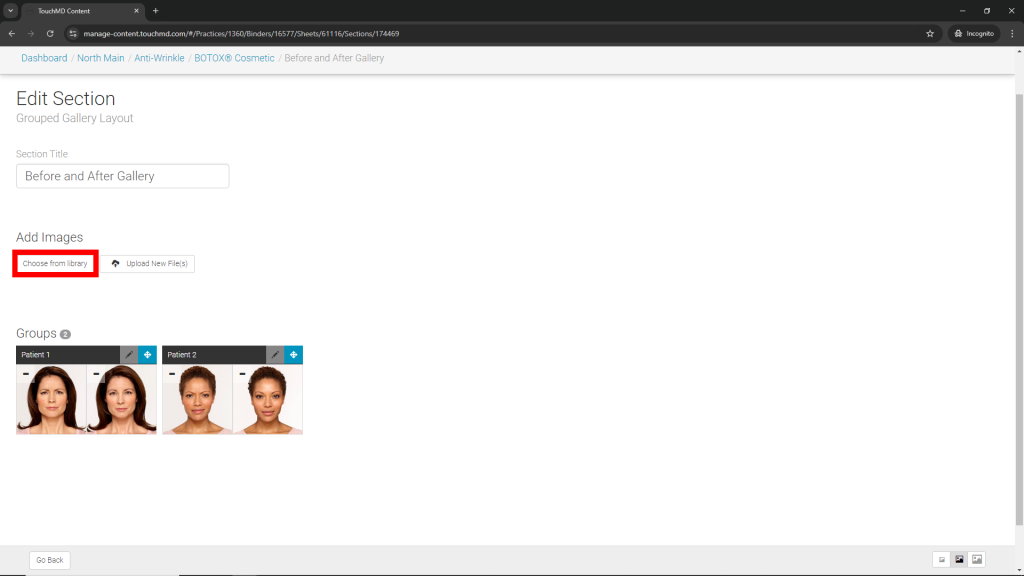
- Select the previously created Grouped Gallery under Sections where you would like to add the image(s) to

- Select “Choose from library”
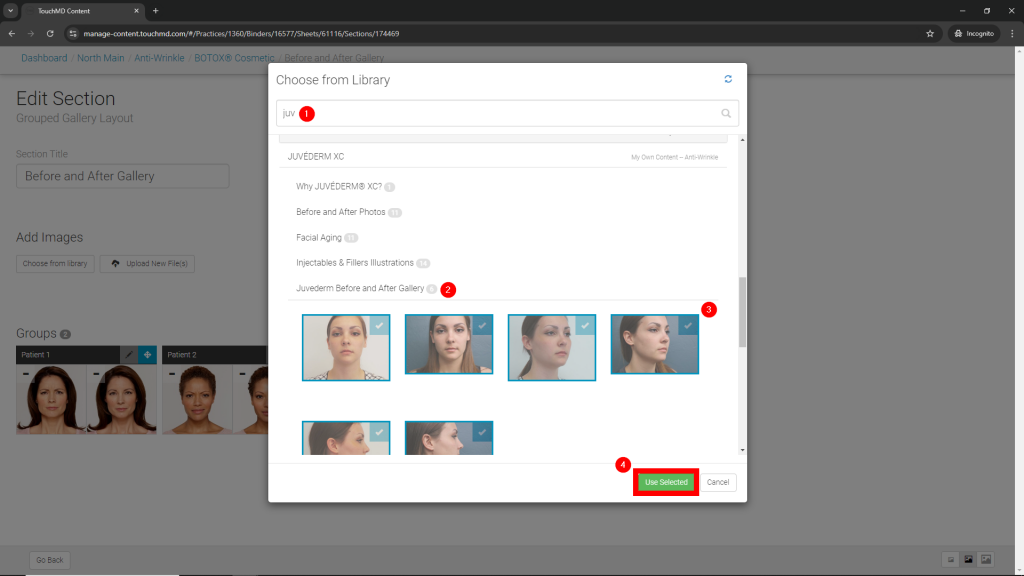
- Browse your library by locating the Sheet the original Grouped Gallery is on, select the desired image(s) from the original Grouped Gallery, and select “Use Selected”
- Group images as desired and select “Create New Group” for each group

- Add image titles and/or descriptions as desired (optional) and press “Save”

Gallery:
- Log onto dashboard.touchmd.com and select “Content”

- Select the desired Binder where you would like to add the image(s) to i.e., “Injectables and Fillers”

- Select the desired Sheet where you would like to add the image(s) to i.e., “Botox Cosmetic”

- Select the previously created Gallery under Sections where you would like to add the image(s) to
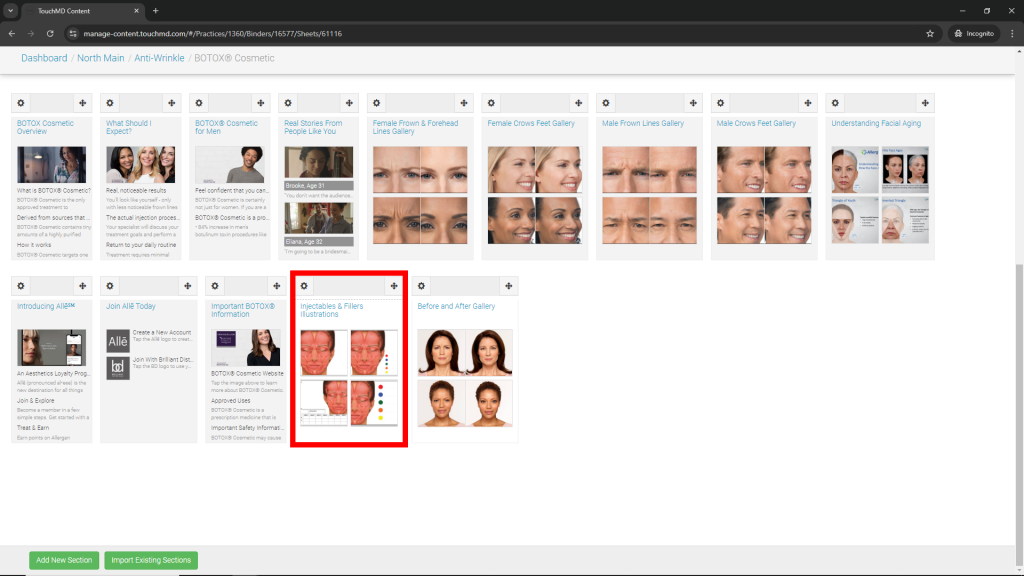
- Select “Choose from library”
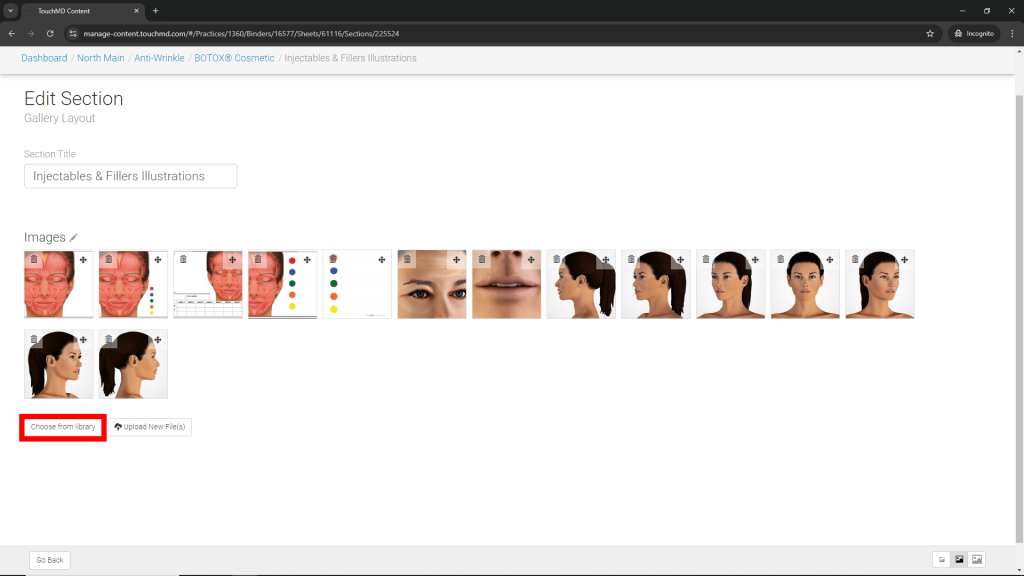
- Browse your library by locating the Sheet the original Grouped Gallery is on, select the desired image(s) from the original Grouped Gallery, and select “Use Selected”
