Read the latest news and more from TouchMD Support:
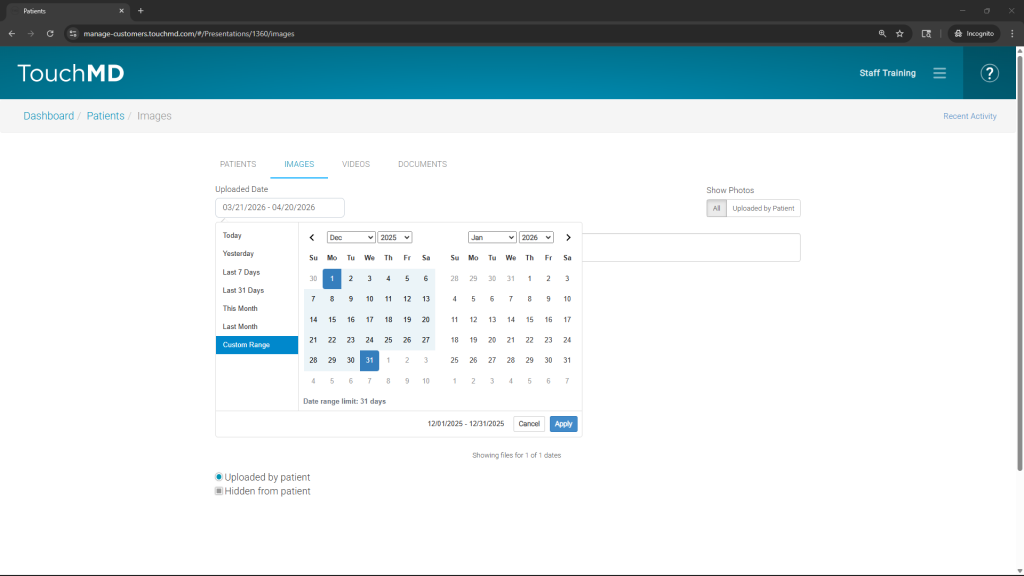
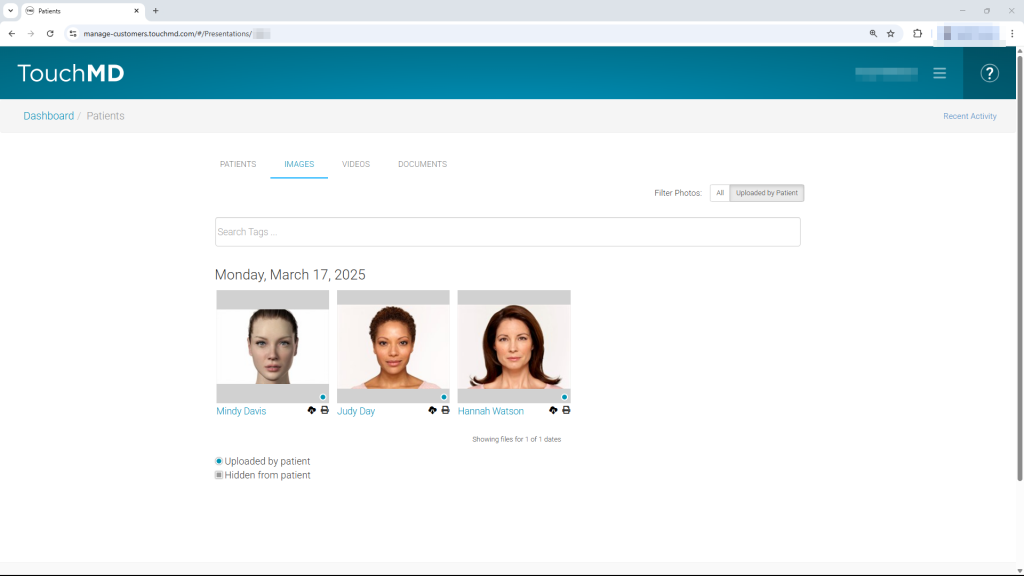
Images in the TouchMD Dashboard can now be searched using date filters to quickly narrow results. Date range options include predefined ranges and Custom Range selection, with filtering applied based on image upload date. See this article to learn more!
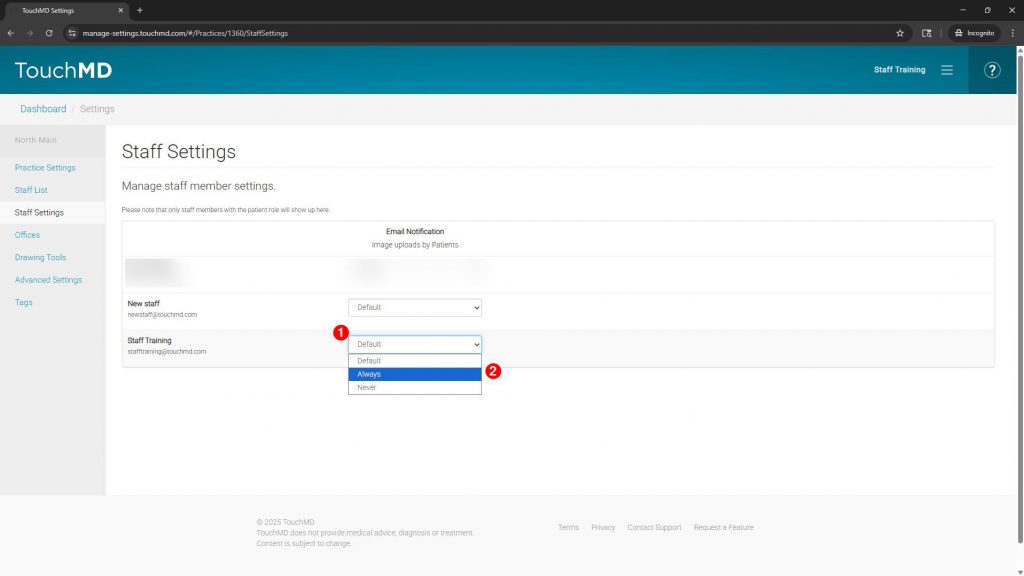
Want to configure which staff receive email notifications when a patient uploads a photo to TouchMD? The new Staff Settings page allows you to customize who should Always or Never be notified. See this article to learn more!
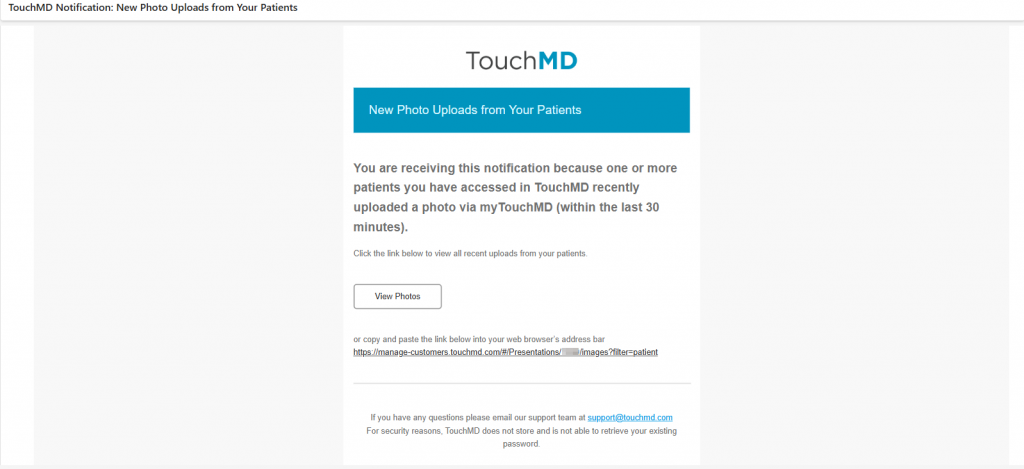
As a reminder: Our platform includes a notification feature that alerts you of new patient photo uploads, enabling timely follow-up and allowing you to take any necessary actions efficiently. See this article to learn more!
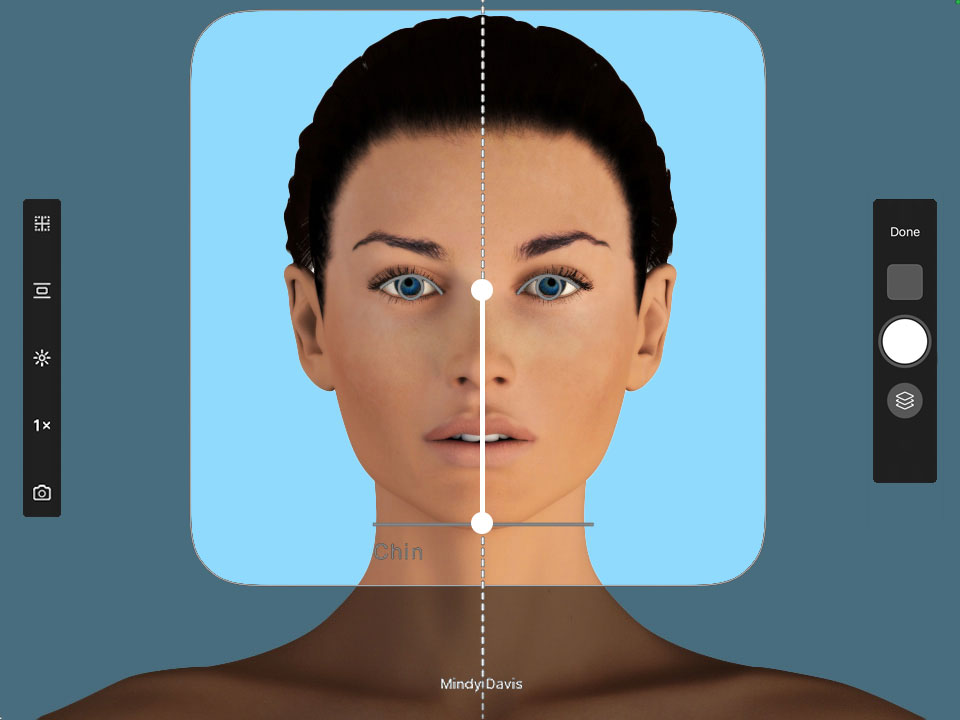
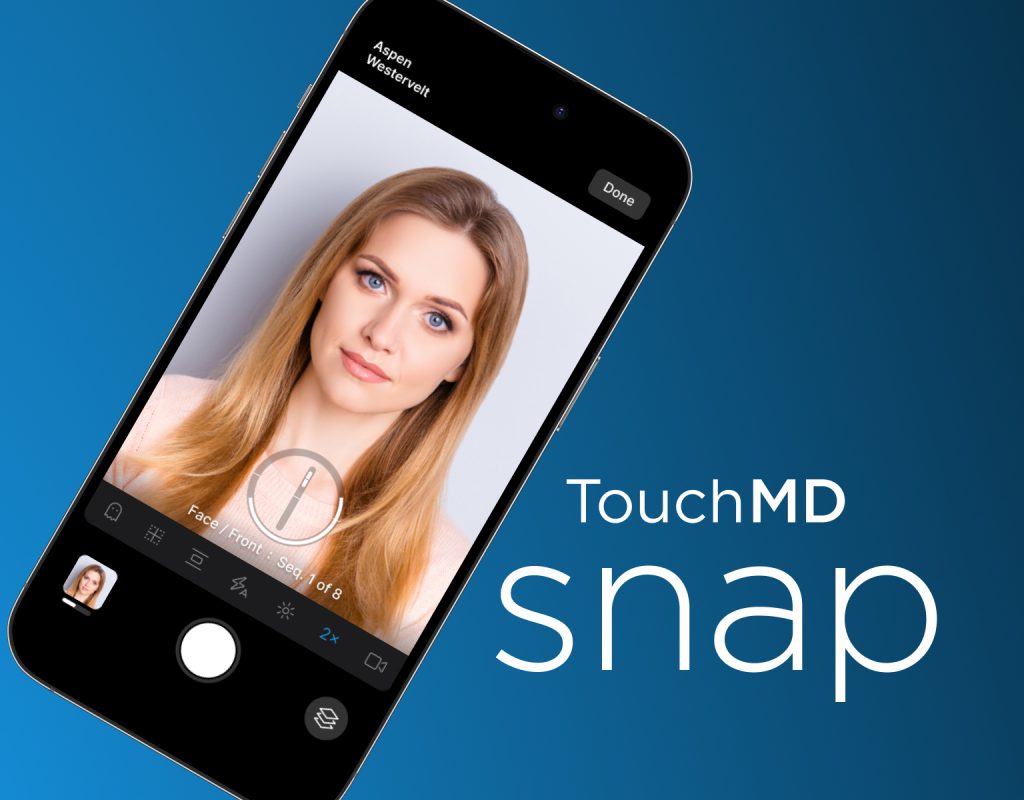
Let Snap Pro’s latest technology automatically capture consistent front, side and oblique face photos that will showcase true results and value of your treatment plan that you will be proud to share with your patient with myTouchMD portal. See this article to learn more!
Want to know when a patient uploads a photo to TouchMD? Our platform includes a notification feature that alerts you of new patient photo uploads, enabling timely follow-up and allowing you to take any necessary actions efficiently. See this article to learn more!
Ever wondered which of your patients have uploaded images into their TouchMD account? TouchMD now offers an exciting option that allows you to view not only a list of those patients, but the photos they uploaded as well. See this article to learn more!
Consult v5.17.0 update*
- NEW photo background replacement tool. Quickly replace unwanted backgrounds with the color of your choice on existing patient photos.
Snap v3.4.0 update*
- NEW photo background replacement tool. Quickly replace unwanted backgrounds with the color of your choice when taking photos of your patient.
- Added support for “virtual lens” zoom options available on some newer iPhone and iPad models.
- Added support for the new iPhone 16 camera control button.
- Added a notification badge count to the Snap settings menu to alert user of any pending uploads remaining.
*Updates Require iOS / iPadOS 17 or higher.
Apple no longer supports the following devices for iOS17: iPhone X, iPhone 8 / 8 Plus, iPad (5th generation), iPad Pro 9.7″, Pad Pro 12.9″ (1st generation).
Background Replacement Tool (Consult and Snap)
In TouchMD Consult
A new background replacement tool has been added to the drawing tools filter menu. Use this tool to quickly replace the background color of any existing patient photo. Select from 8 common colors or add up to four custom colors of your own.
Follow these steps to replace the background color in Consult:
- Open the patient’s gallery and select the desired photo.
- Tap on the ‘Draw’ button and select the “Filter” tool.

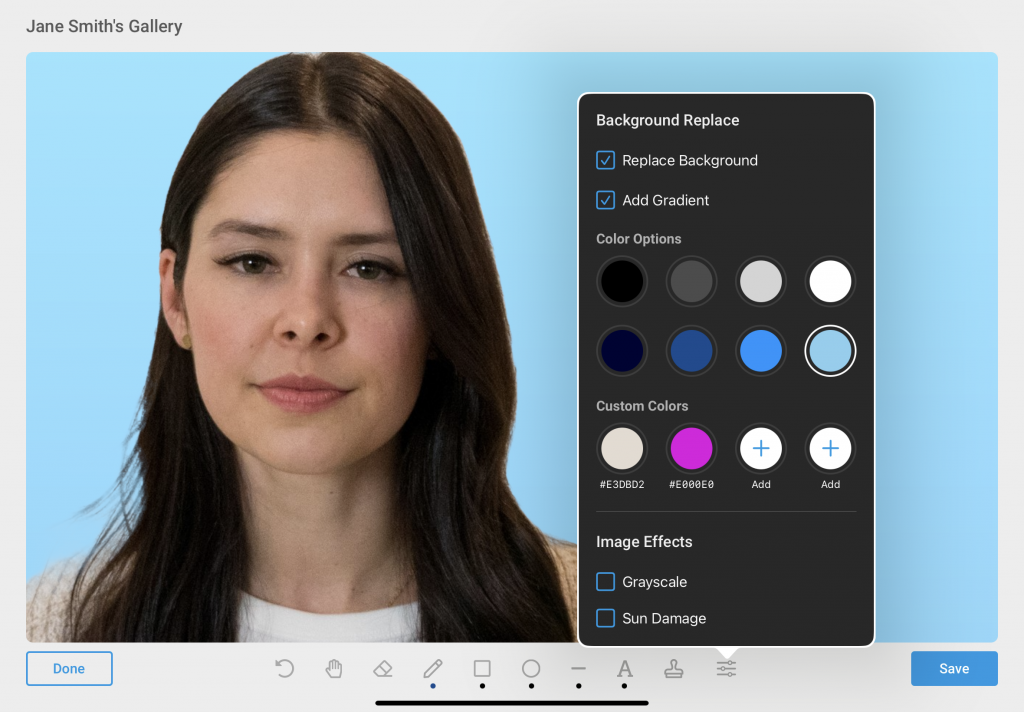
- On the filter tool ‘Background Replace’ options, select one of the 8 standard replacement colors, or add/choose a custom color.
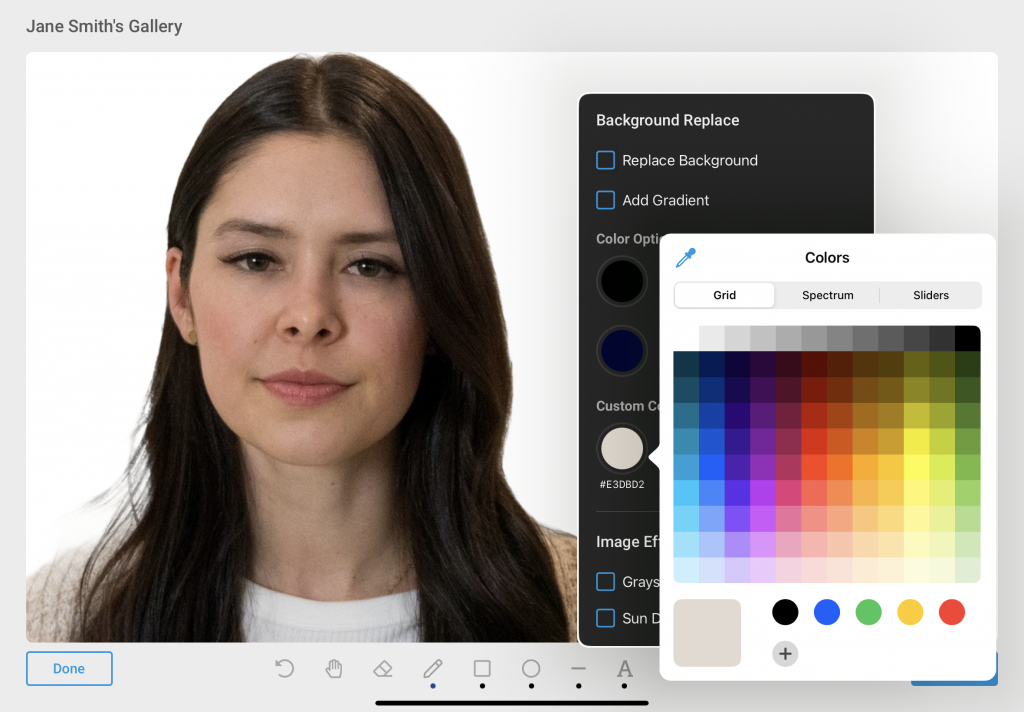
- Tap on the “Replace Background’ option. For a more natural looking background, we recommend also selecting the ‘Add Gradient’ option.
Click here for step-by-step guide to this feature in the TouchMD Consult app.
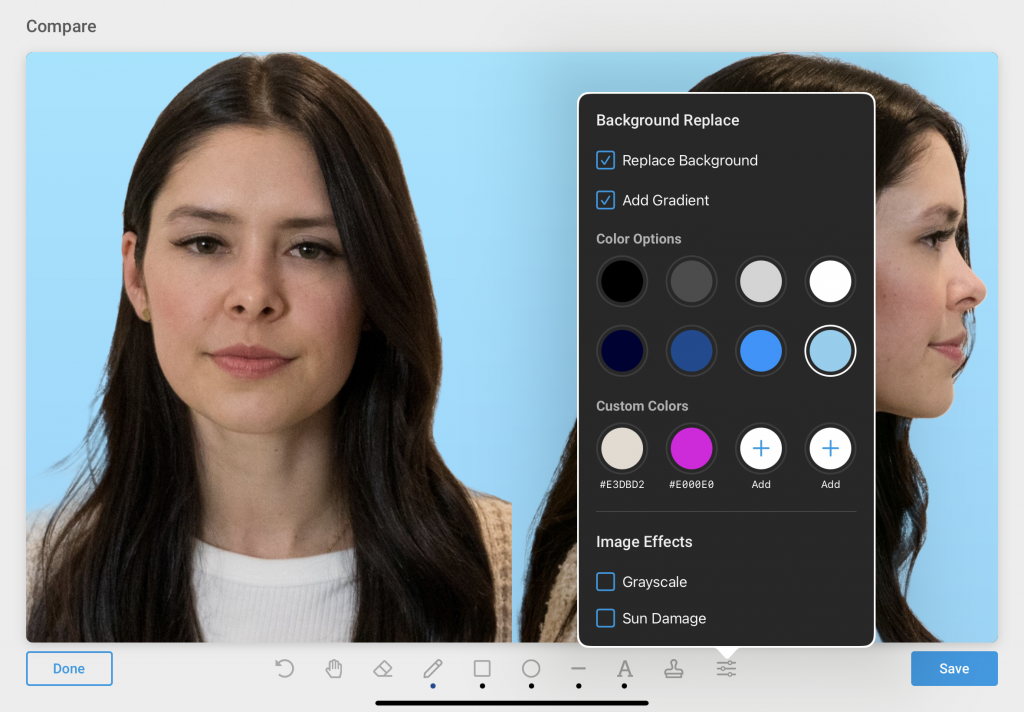
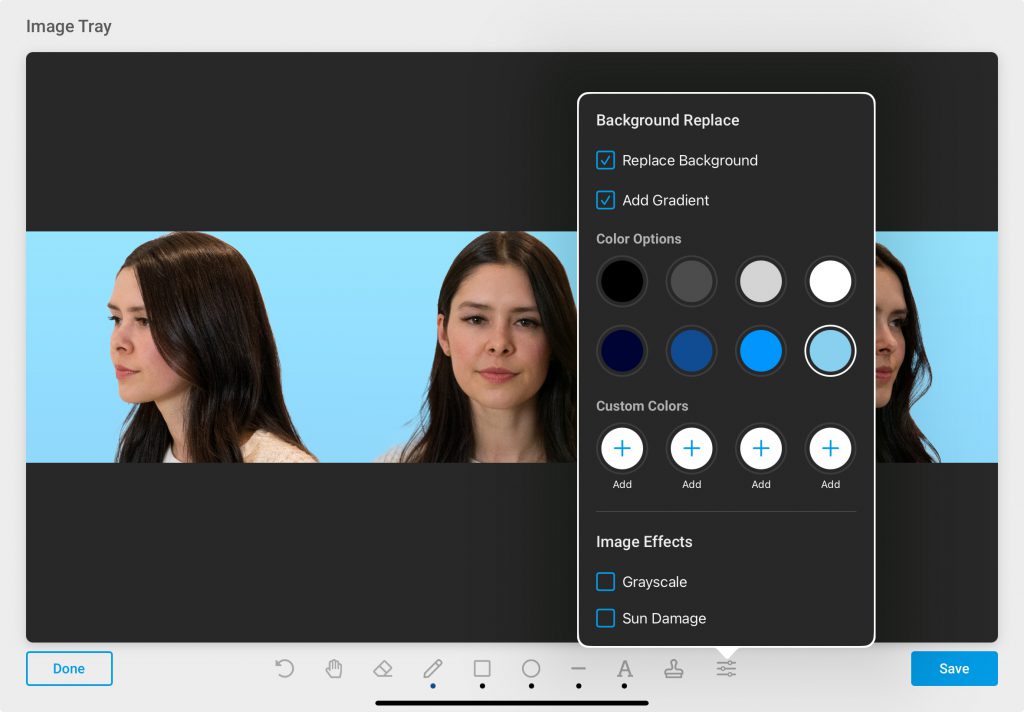
Want to add that “wow” factor to before/after photos on social media? Use the background replacement tool to seamlessly replace all the backgrounds on composite photos created with the Consult image ‘Compare’ tool or ‘Image Tray’ templates. Doing this will provide a consistent background across the entire composite photo.
In TouchMD Snap
A new background replacement tool has been added to the photo session menu. Use this tool to quickly replace the background color of any photo as it is taken in Snap. Select from 8 common colors or add up to four custom colors of your own.
Follow these steps to replace the background color in Snap:
- Select your desired patient and start a photo ‘session’.
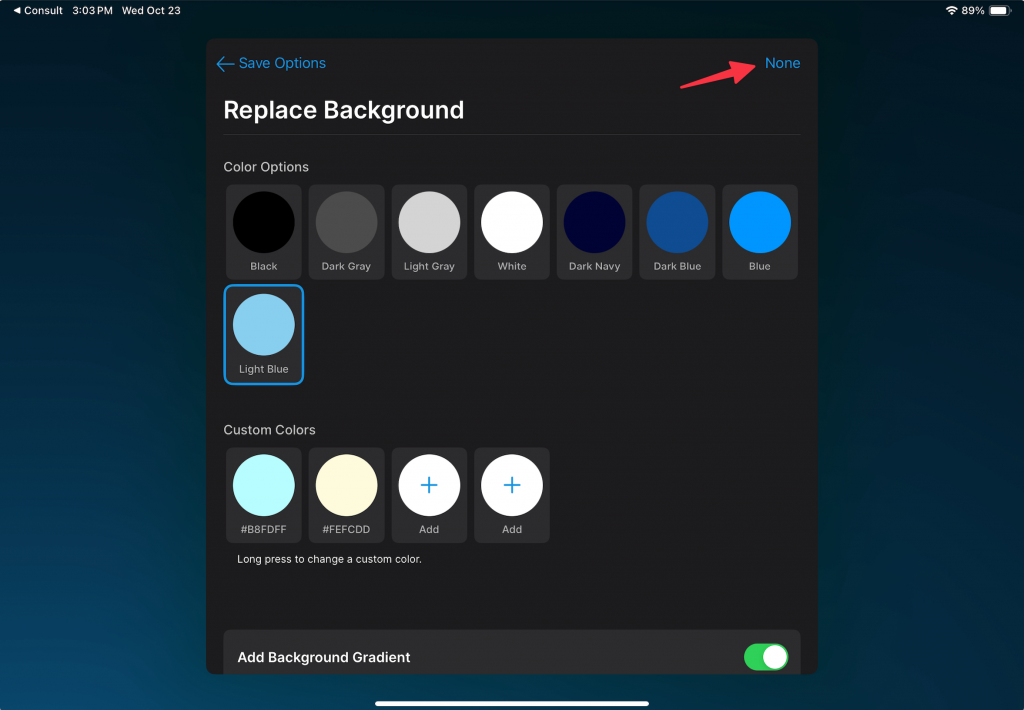
- On the session ‘Save Options’ menu, select ‘Replace Background’.
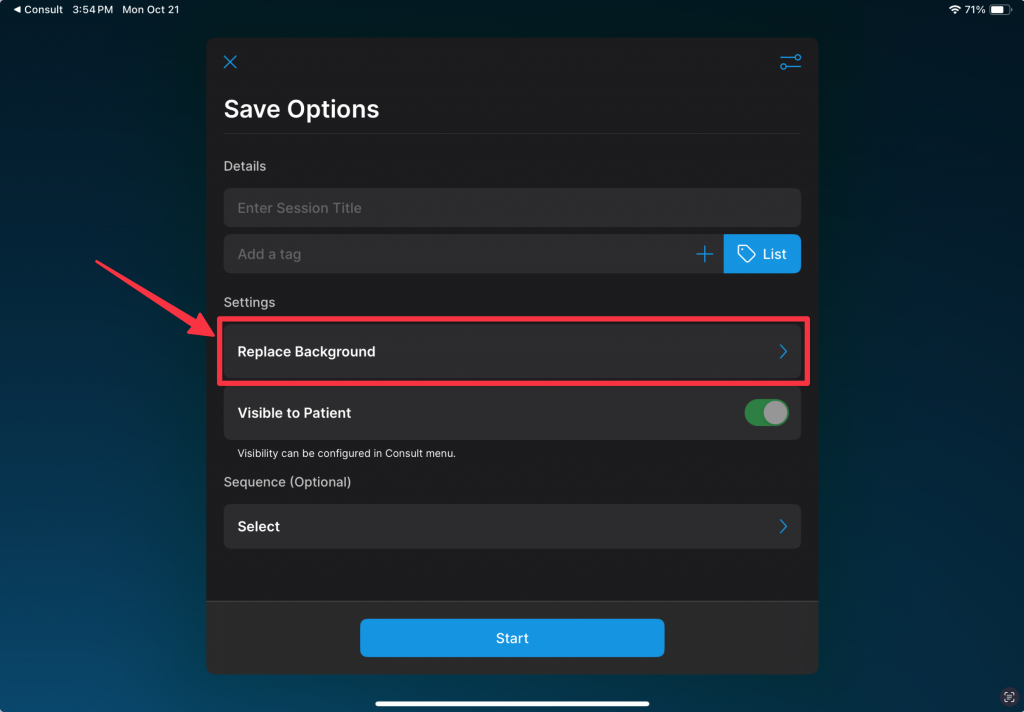
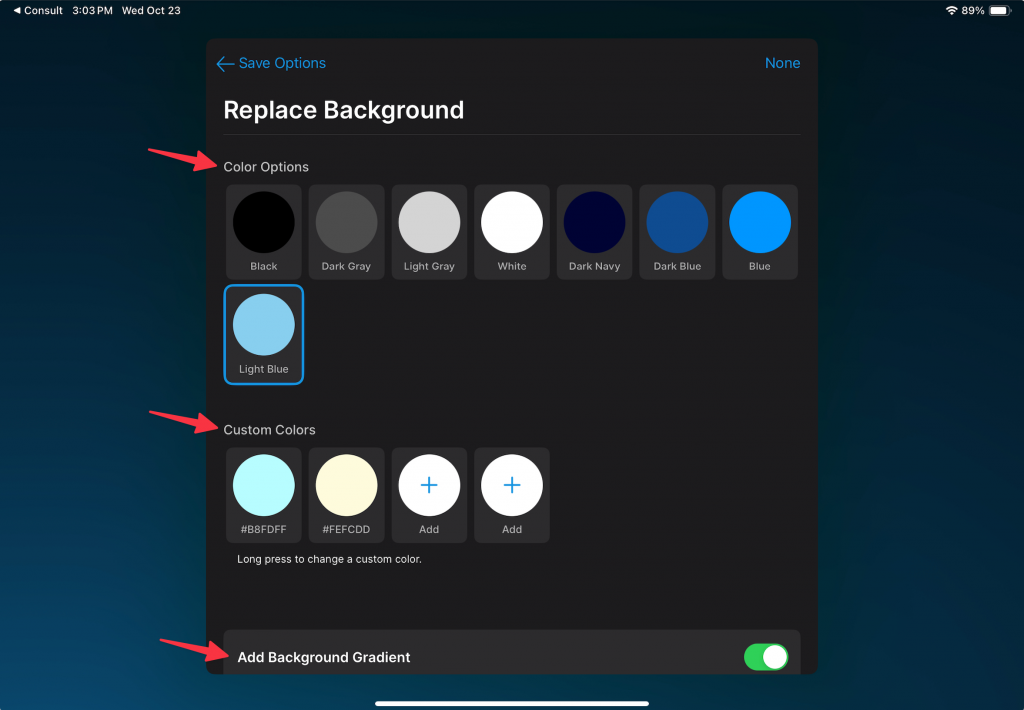
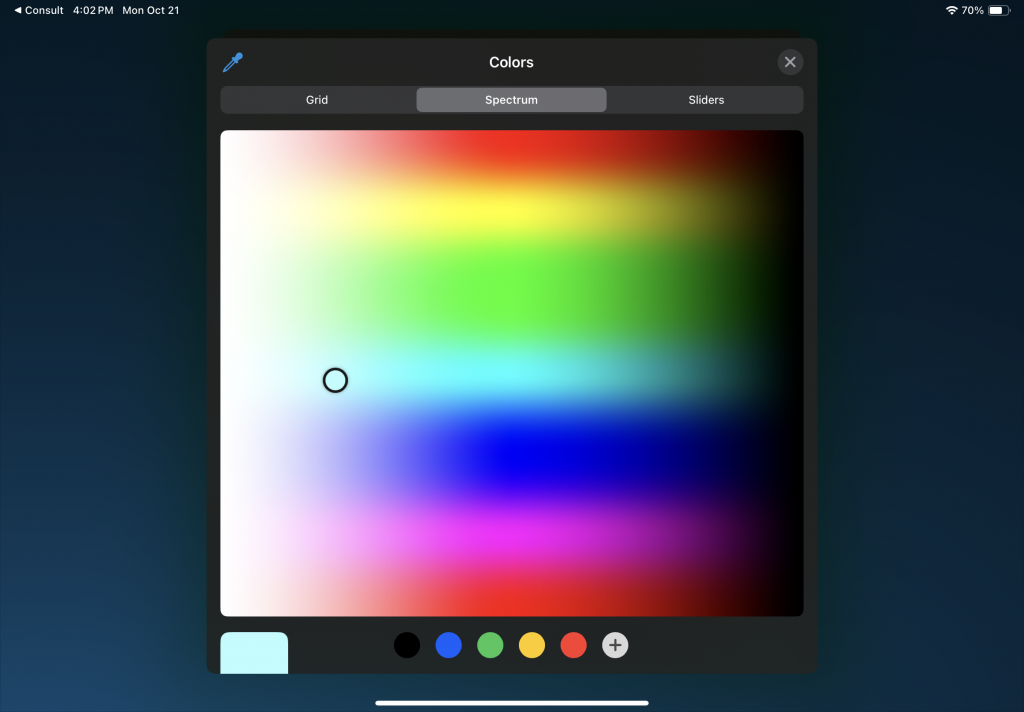
- On ‘Replace Background’ menu, select one of the 8 standard replacement colors, or add/choose a custom color. For a more natural looking background, we recommend also keeping the ‘Add Background Gradient’ option enabled.
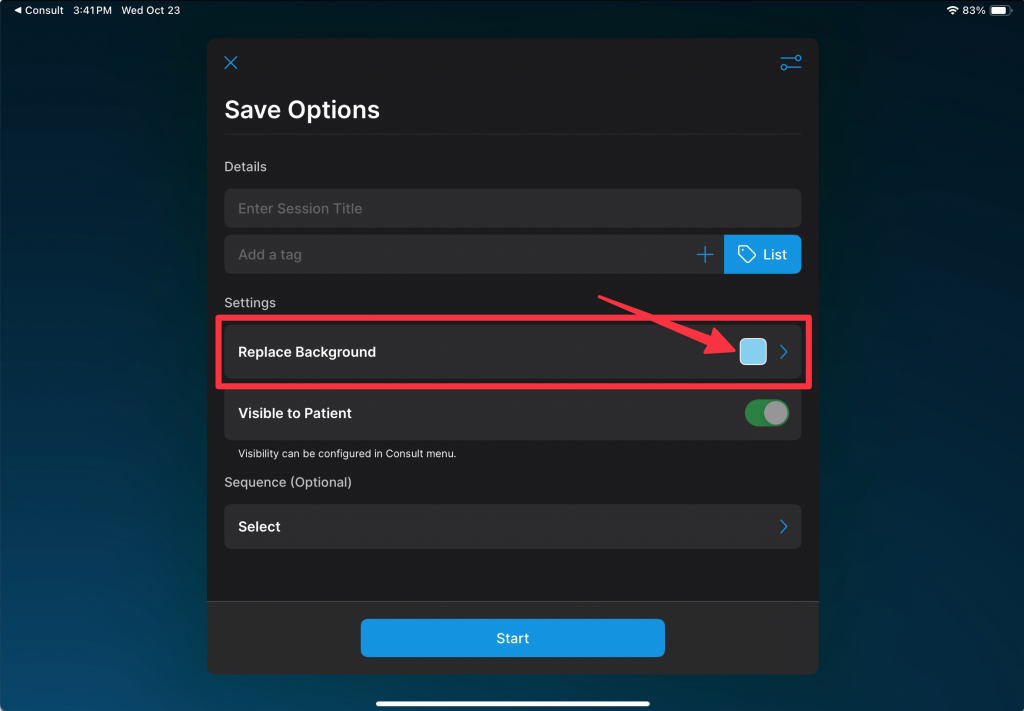
- The “Replace Background” button will now display the selected replacement color.
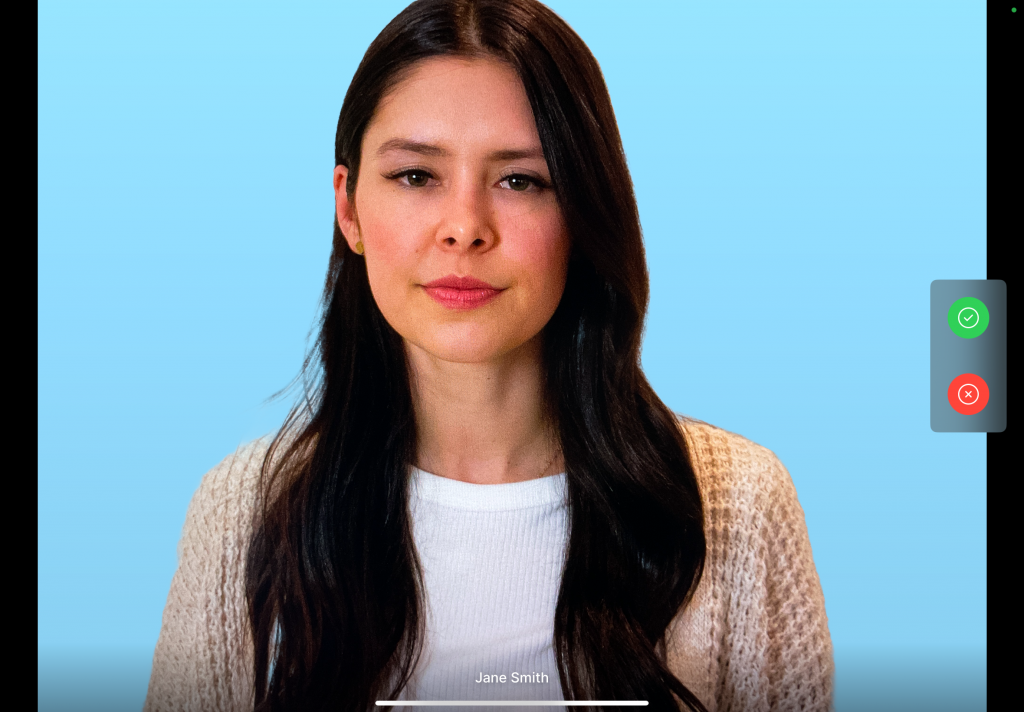
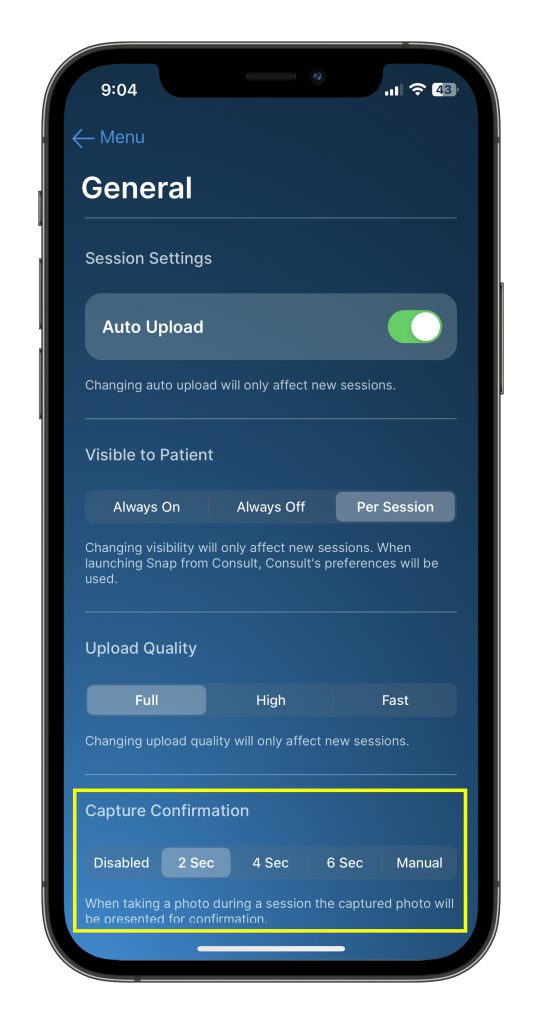
- Start your photo session and take your patient photos. NOTE: If you want to review the photo with the background replaced prior to upload, either the ‘Capture Confirmation’ needs to be enabled or the ‘Auto Upload’ disabled in the Snap ‘General’ settings menu.
- Snap will remember the last used ‘Save Options’ each time a new photo session is started. To remove (disable) the background replacement color, select the ‘Replace Background’ from the ‘Save Options’ menu and tap the ‘None’ button
Click here for step-by-step guide to this feature in the TouchMD Snap app.
Virtual Lens Zoom Options (Snap)
In addition to supporting the optical lenses on Apple devices, Snap now supports Apple’s ‘virtual lens’ zoom options available on newer Apple devices. For the highest quality photos, we recommend using these preset zoom options and then adjusting the device’s distance from the patient, instead of an on-screen manual zoom (or pinch-to-zoom)*.
To access available zoom options for your device:
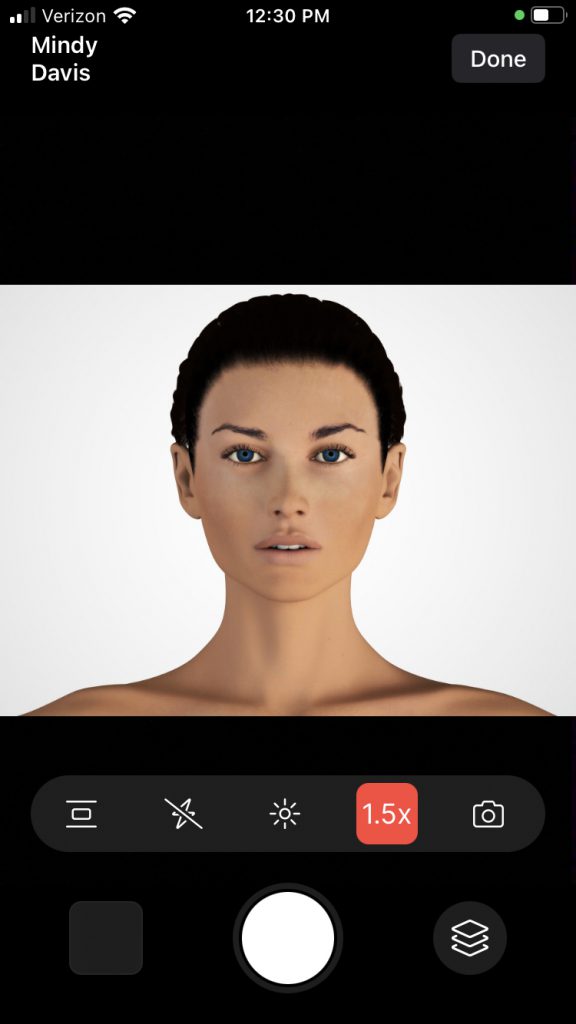
- Tap on the ‘lens’ button in your Snap session
- Select your camera lens
- Select a zoom option for the desired lens (note: not all lenses have additional zoom options).
For devices with multiple lenses: When available, we recommend using the ‘Back Dual Camera’ or ‘Back Triple Camera’ for the best photo quality, rather than selecting one of the single ‘back’ lens options. When using the Back Dual or Triple Camera options, the camera will decide the best lens to use for the zoom, subject, and lighting.
Click here for a guide on choosing the correct lens in the TouchMD Snap app
*NOTE: As a safeguard, when using the on-screen manual zoom (or pinch-to-zoom), the ‘Lens’ icon will turn red when using a digital zoom. This indicates a potential loss in image quality. For best results, the ‘Lens’ icon will be white to indicate the use of a higher quality optical or virtual lens.
iPhone 16 Camera Control Button (Snap)
Snap now supports the new ‘camera control’ button only available on the new iPhone 16 and 16 pro models.
Options for the camera control button include:
- Clicking the button captures a photo in photo mode
- Clicking the button starts/stops video capture in video mode
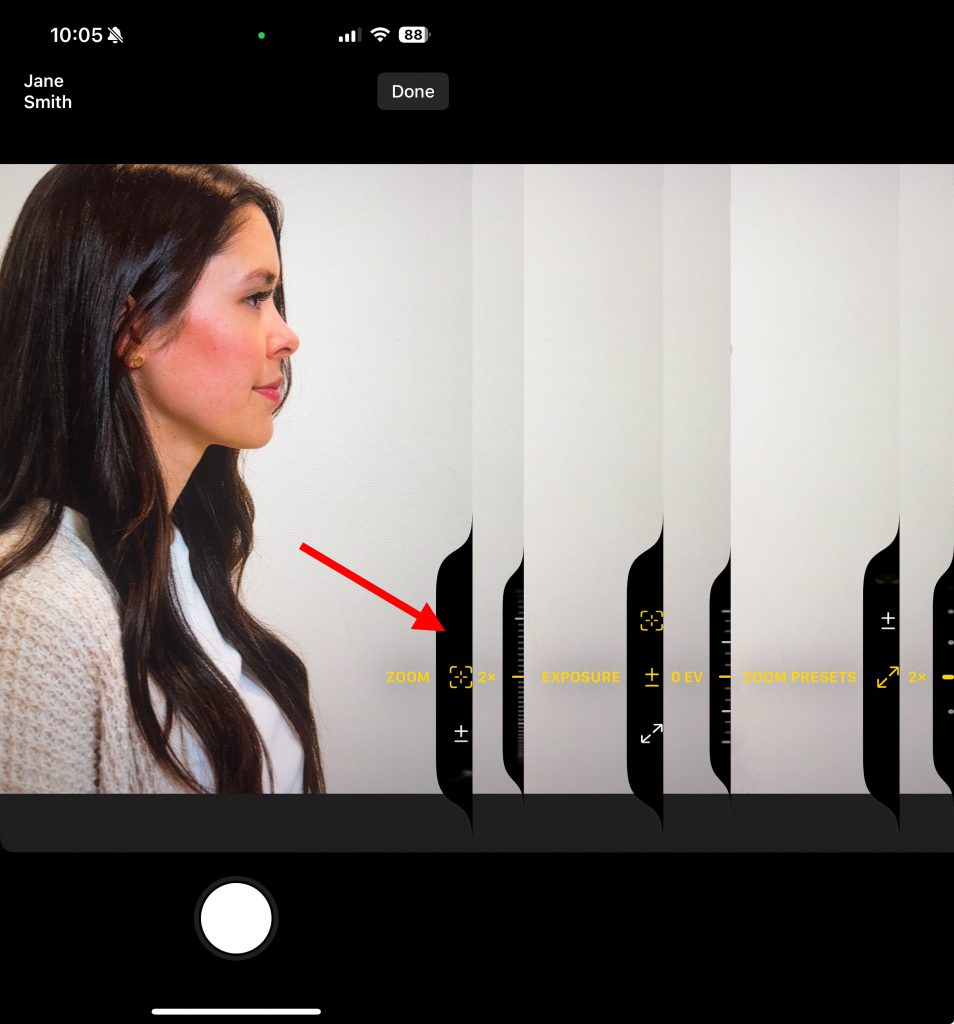
- Slider control for Zoom
- Slider control for Zoom Presets
- Slider control of Exposure
Pending Session Notification Badge Count (Snap)
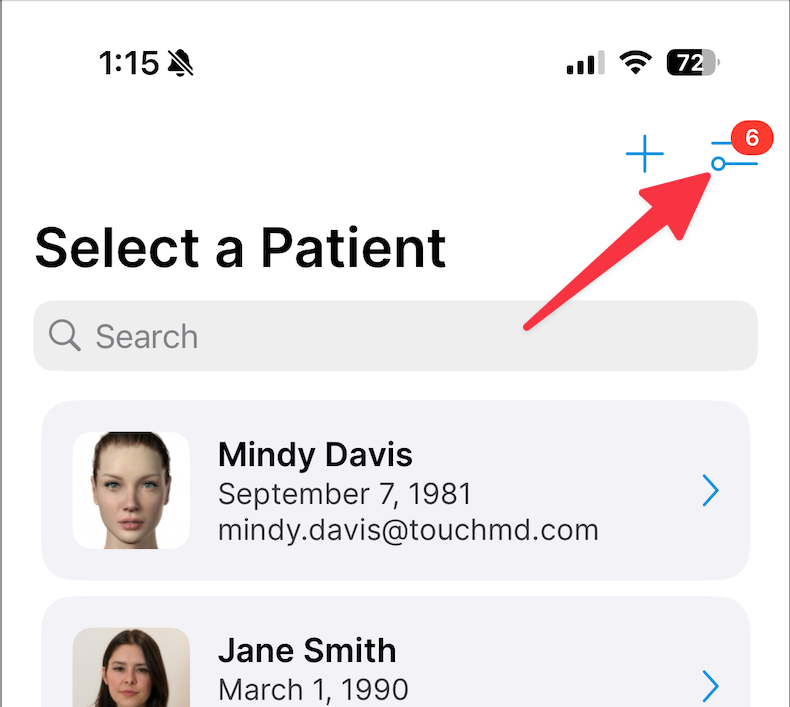
A new notification badge has been added to the Snap settings menu button to call attention to any ‘Pending Uploads’ remaining that need to be reviewed. This reduces the need to specifically navigate into the settings menu to check for any ‘pending uploads’, and is a more visible indicator that ‘pending sessions’ exist throughout most screens in the Snap app.
Beginning June 28th, 2024 you will notice changes to your login screens for the TouchMD Consult, Snap, and Dashboard Apps. To learn more about these changes, please the information below and this link. This link has a video to shows you the changes.
Introducing Snap v3
Snap v3 was rebuilt from the ground up for better a user experience and upload performance. This new version features a new modern design including support for ‘Dark Mode’. Other notable updates include the following:
- A groundbreaking horizontal and vertical level with ‘Auto Snap’ mode
- Simplified ‘save’ options, with the less used options now found in the general settings
- New Photo capture confirmation with setting options including off, manual, and auto up to 6 seconds
- New patient visibility options… always on, always off, and per session
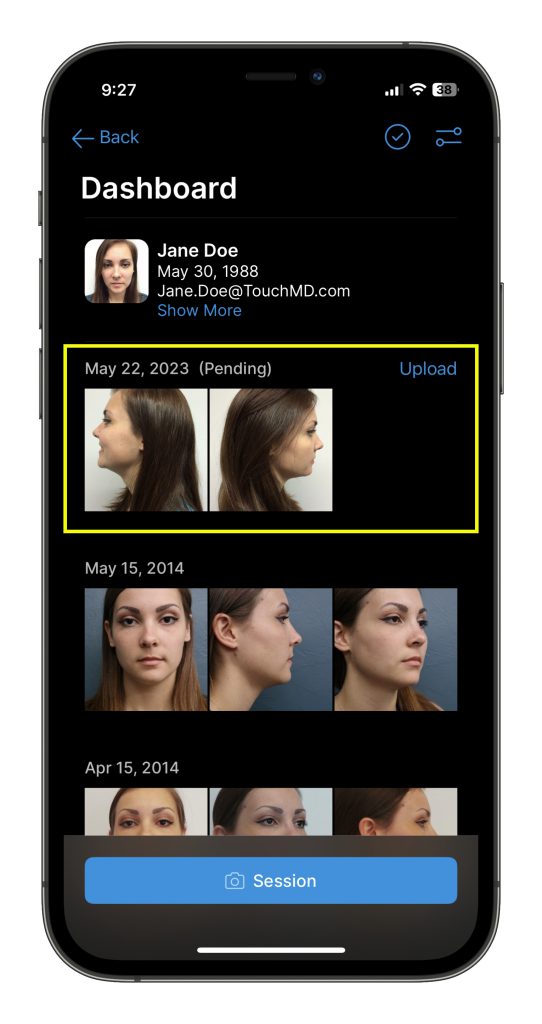
- See pending photo uploads in individual patient galleries and on the ‘Pending Uploads’ screen
- Open the App menu, including ‘Pending Uploads’ when Snap is accessed through the Consult app
- Intuitive new custom exposure settings
- Better placement of the controls at your fingertips
What’s New or Changed?
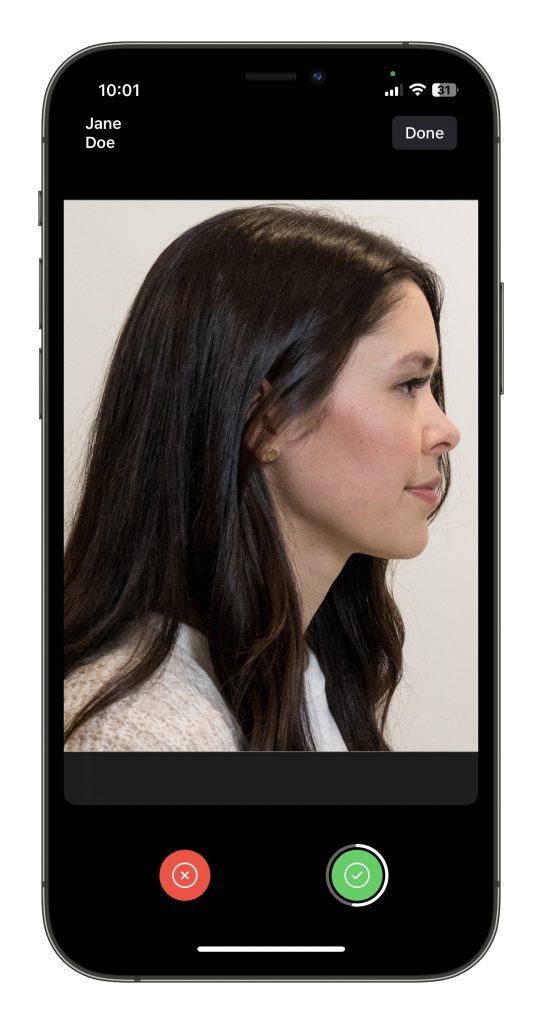
New photo capture confirmation
Now confirm the photo just taken prior to upload. If you like the photo, do nothing and it will save it to your upload queue after 2 seconds. To review the photo closer, just tap the image to stop the review timer. Use two fingers pinch and zoom review the photo closer. If satisfied, tap the green button to save the photo to the upload queue. To delete and retake the photo, tap the red button.
If you do not like the 2 second photo capture confirmation, you have the following additional options found in the ‘General’ settings of the app menu:
- Disabled – No photo confirmation after picture is taken… the feature is always off.
- 2 Sec – Photo is automatically saved to the upload queue after a 2 second preview (default setting).
- 4 Sec – Photo is automatically saved to the upload queue after a 4 second preview.
- 6 Sec – Photo is automatically saved to the upload queue after a 6 second preview.
- Manual – Photo confirmation is always on and user has to select the ‘confirm’ or ‘retake’ buttons.
New Combined Horizontal and Vertical level with ‘Auto-Snap’ feature
With our new intuitive level, now you can make sure your device is level on both the horizontal and vertical planes. Use the outer ring to adjust the horizontal level, and use the inner bar adjust the vertical level. The levels will turn yellow when level.
Turn on the ‘Auto Shutter’ option to automatically snap a picture when everything is level for 1 second.
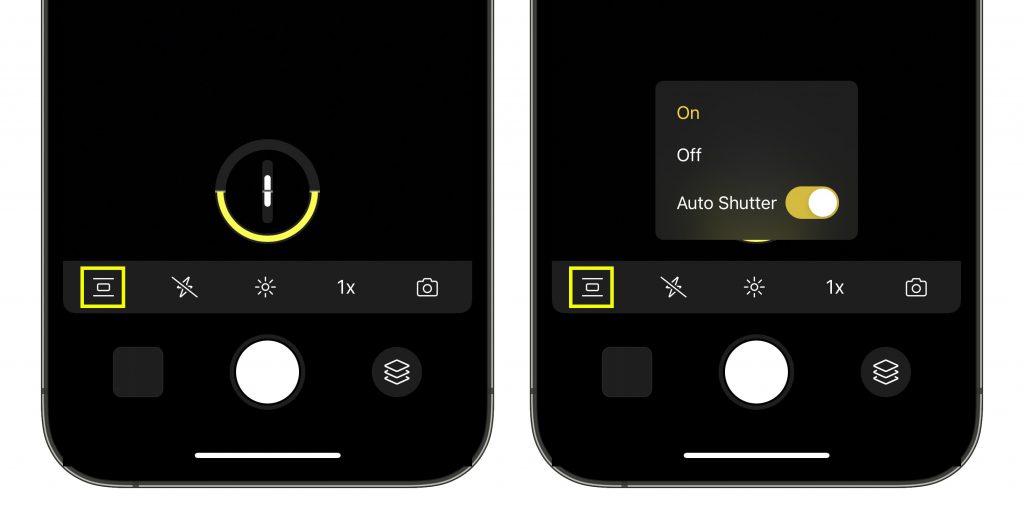
Please Note: When this ‘Auto Shutter’ option is active, you will always have to confirm the photo captured. Additionally, if the device is laid flat on a table/desk the camera will consider it level and snap a photo.
Simplified ‘Save Options’ screen
The ‘Auto upload’ and ‘Upload Quality’ settings usually change from session to session. So to prevent these settings from accidentally getting changed, we have moved these two options from the ‘Save Options’ screen to the ‘General’ settings of the app menu.
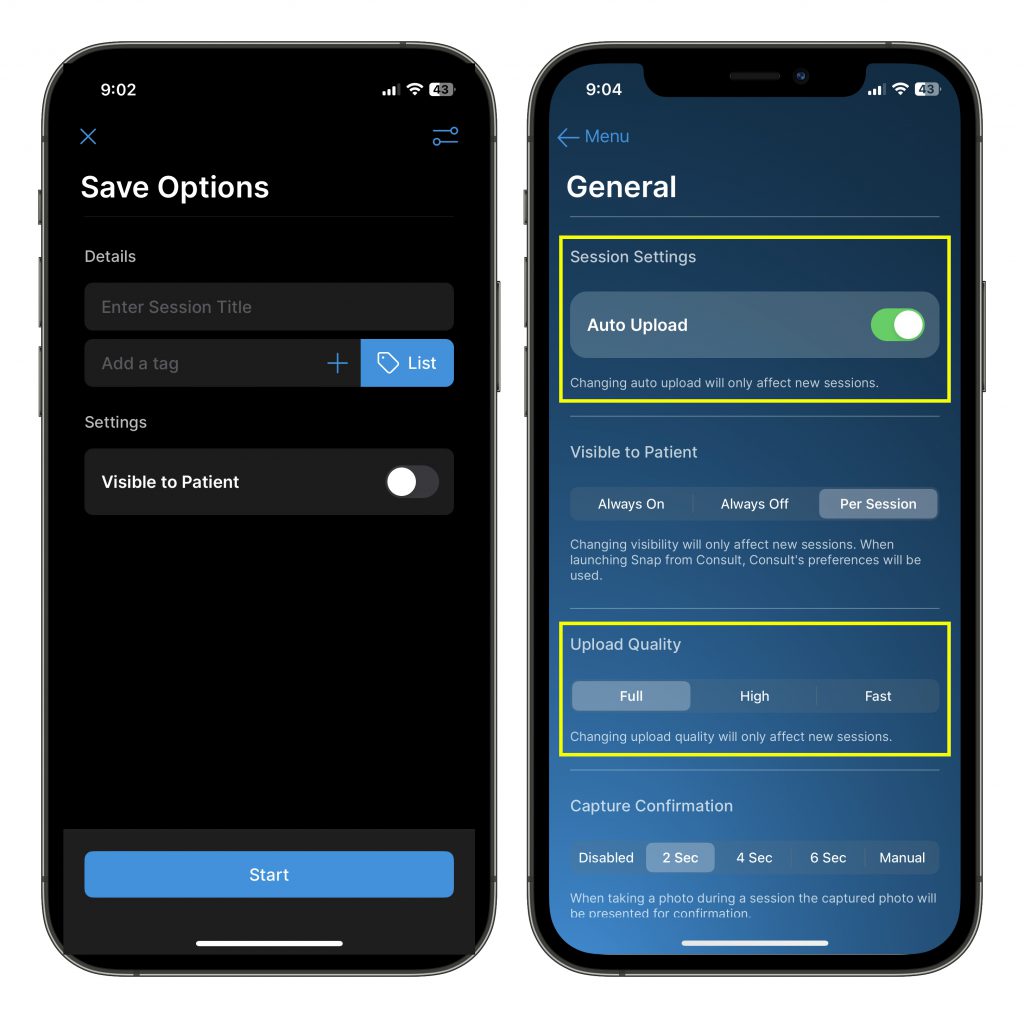
Additionally, we now have three options for patient image visibility on this screen:
- Always On – Images/videos upload will always be visible to the patient at home and disables the ‘Visible to patient’ option from the ‘Session Options’ screen
- Always Off – Images/videos uploaded WILL NOT be visible to the patient at home and disables the ‘Visible to patient’ option from the ‘Session Options’ screen
- Per Session – Enables the ‘Visible to patient’ option on the ‘Session Options’ screen so the user can select whether images/videos upload will, or will not be visible to the patient at home on case-by-case basis.
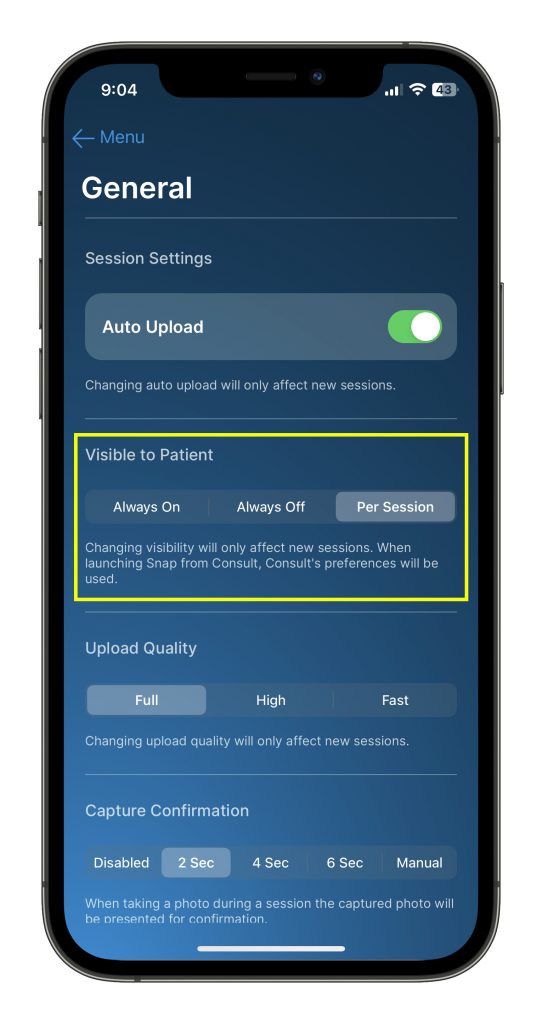
Note: These are a ‘per device’ settings and options must be selected on each Snap device.
Controls are now at your fingertips
We have moved all the controls closer to your fingertips. On an iPhone, all controls are near the bottom of the iPhone.
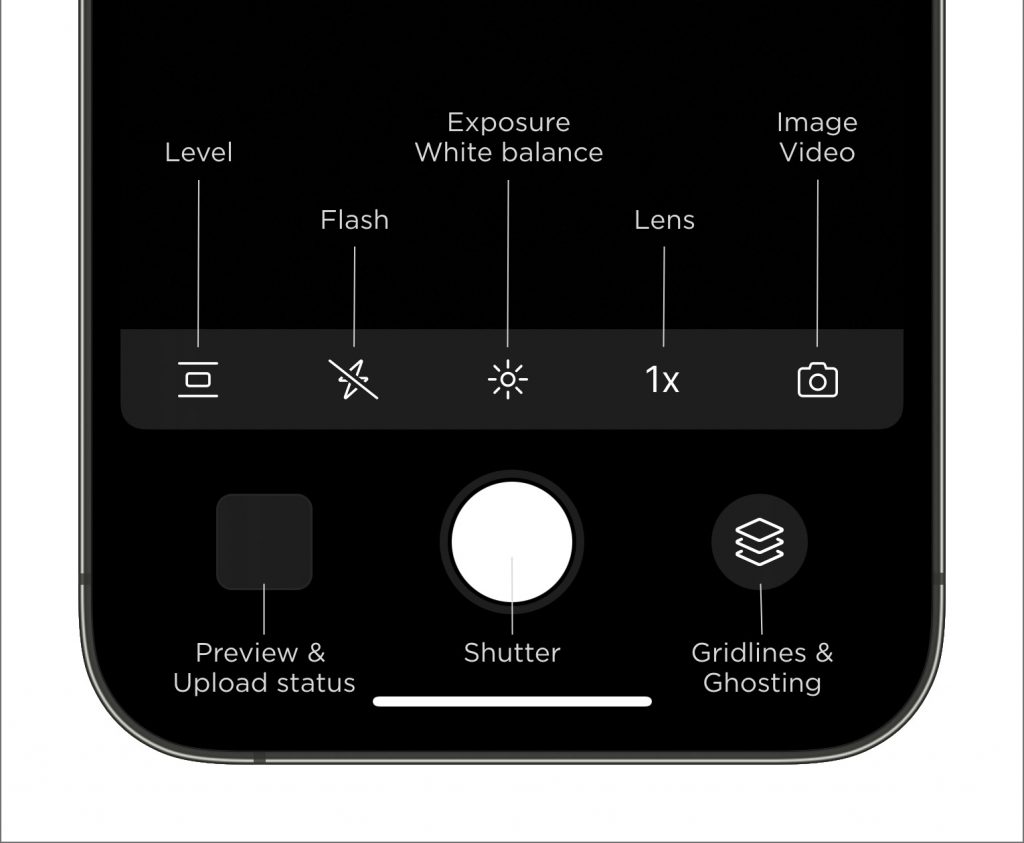
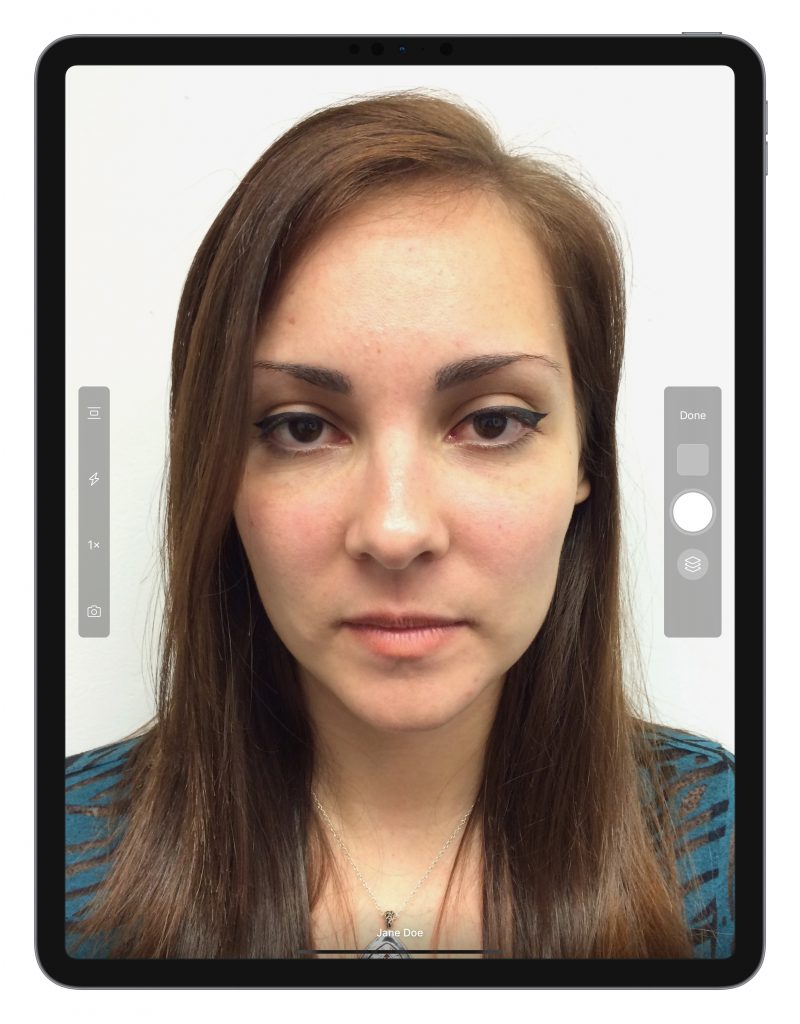
On the iPad, all controls are on the left and right edge of the iPad.
‘Pending Sessions’ is now ‘Pending Uploads’ in the App Menu and in the Patient’s Gallery
You will no longer find ‘Pending Sessions’ at the bottom of the patient list. Instead you will find ‘Pending Uploads’ in the App Menu when pending uploads exist.
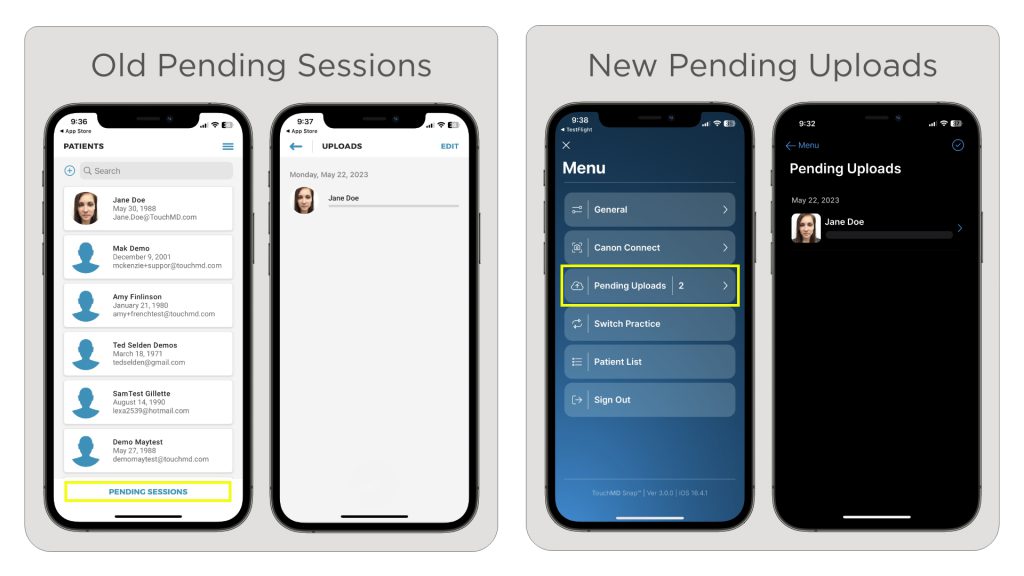
Additionally, when viewing the patient gallery you will see any pending uploads for that patient as well (if they exist).
Can you imagine being able to save your patient’s before and after images into a slider video to showcase their transformation? Introducing the TouchMD Slider Tool with video!
- This feature is part of the Consult App’s Image Tray. See more info here.
- It allows you to make comparisons between two images, where the images will be superimposed on each other.
- Saving the image comparison slider video is easy! Find step-by-step instructions on our Help Website.
- Your Consult App should automatically update with this new feature. Available now! Contact our Support Team if you need assistance.
We can show you what it’s all about in less than 5 minutes. Check out this video made by our President of Sales, Tyler Terry.
With Canon© Connect, the dreaded task of uploading photos from the camera to the computer is completely eliminated.
- To see if your camera is recommended for Canon© Connect, view the list of eligible cameras.
- To set up Canon Connect with your TouchMD, here are the steps.
Not using Snap for your patient photos yet? Let’s talk! We can streamline your office photography. Reply to this email and we’ll connect you with the right person.

Kaeli Lindholm is the CEO of KLC Consulting and founder of the POP Aesthetic Leadership Academy, a 12 month leadership development incubator for women in aesthetics and wellness who disrupt the status quo.
The majority of aesthetic practices today offer similar treatments and services. A key to beating commoditization is through creation of proprietary offers that can’t be duplicated.
In this session we took a comprehensive approach combining and naming proprietary treatments and services to stand out as the obvious choice for high paying clients and become known for something distinct in your market!
In this session, you learned to:
- Market synergistic treatment & product pairing to improve overall results and increase per patient revenue
- Design and price your own proprietary bundles
- Identify your most valuable offers to focus on simplifying to scale
- Received a celebrated step by step guide to assist you in building out and pricing your proprietary bundles
Want to learn more, select here!
Join Account Manager, Amy Finlinson, as she takes you through different features that could be used to increase your usage of TouchMD.
This link will shows the steps needed to enable educational materials to allow for Recommendations to be made, how to create Homework Packets, and how to add Consents to your library.
This link teaches you how to use drawing tools to engage patients.
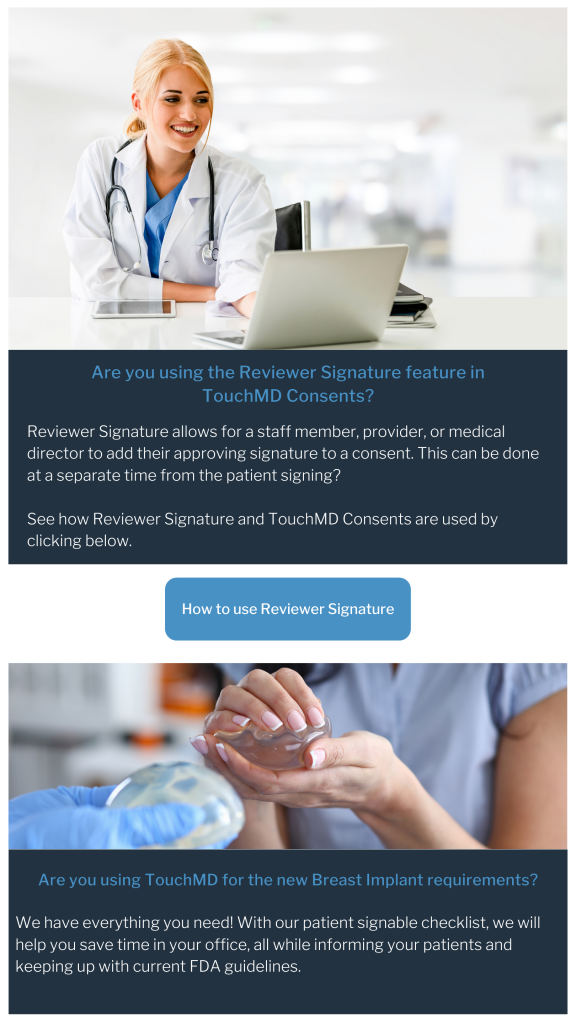
Are you stressed about the new requirements for Breast Implants?
TouchMD has you covered! Check out our time saving tips on pulling the information into your presentation!
The FDA announced new guidelines and requirements intended to increase communication with patients and help them make informed decisions regarding breast implant surgery. New requirements often bring stress and make you wonder how your office will have time to implement them.
TouchMD has everything you need! We will help you save time in your office, all while informing your patients and keeping up with current guidelines.
Are you looking for the Breast Implant Checklists?* We have them!
Publish the signable checklist for your patients and doctors from our Consent Library, and build out a Homework packet for the more detailed brochure. See the links below to learn how.
Signable Checklist:
Detailed Brochure:
As always, we are here to help wherever we are needed. Please reach out to our support team with any questions!