- Make sure your patient is logged onto the TouchMD Consult app
- Take the desired pictures of the patient with your Canon camera
- Leave the Canon camera on.
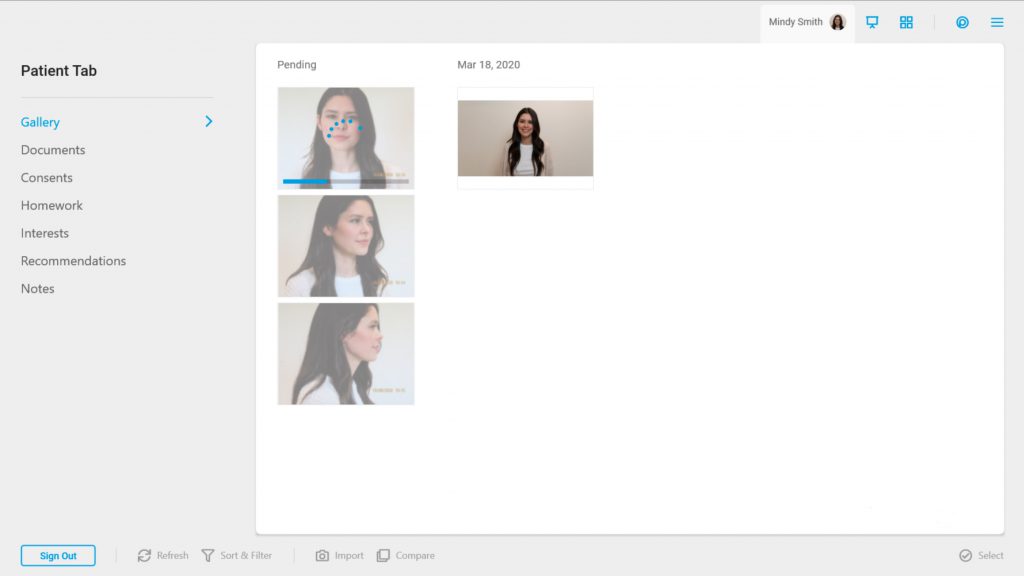
- In Consult, open the Gallery in the Patient Tab. Tap the “Canon Camera” option from the “Import” tools.

- The “Import Camera Images” screen will now be displayed for the last used camera (NOTE: if you are using multiple cameras, select the desired camera from the drop down menu above the pictures). Select the desired pictures to import, add a title (optional), add tags (optional), verify patient image visibility, and tap the import button.
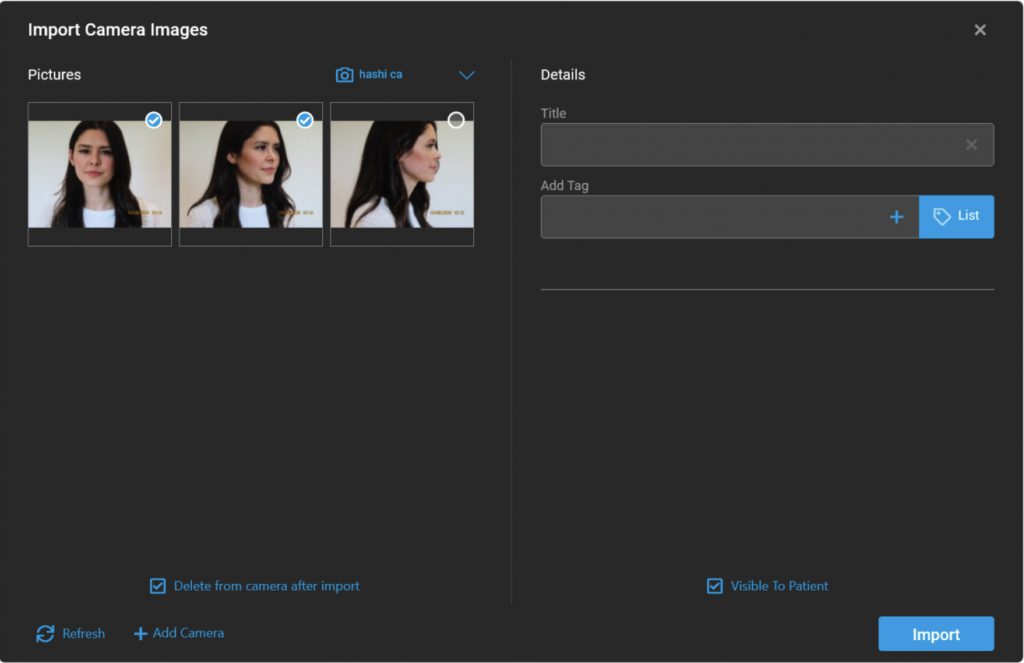 NOTE: We highly recommend keeping the “Delete from camera after import” option enabled. If you don’t enable this option, all images will remain on the camera’s SD card to be accessed during each photo session. This has the potential of slowing down the photo process and exposing previous patient’s photos to other patients. If you would like a backup copy, we encourage you to consider our Local Backup option. Click here to learn more, or contact your Account Manager. If you decide to not enable the “Delete After Import” we recommend you transfer images off your SD card daily.
 - Your images will now begin the transfer process from the camera (progress bar), and upload to the TouchMD patient file. Images WILL NOT be deleted from the Camera until they are successfully uploaded to TouchMD’s cloud servers. In the case of a transfer or upload error, tap and hold on the image to cancel the transfer/upload. Verify your camera is still powered on and within range of your WiFi access point and try again.