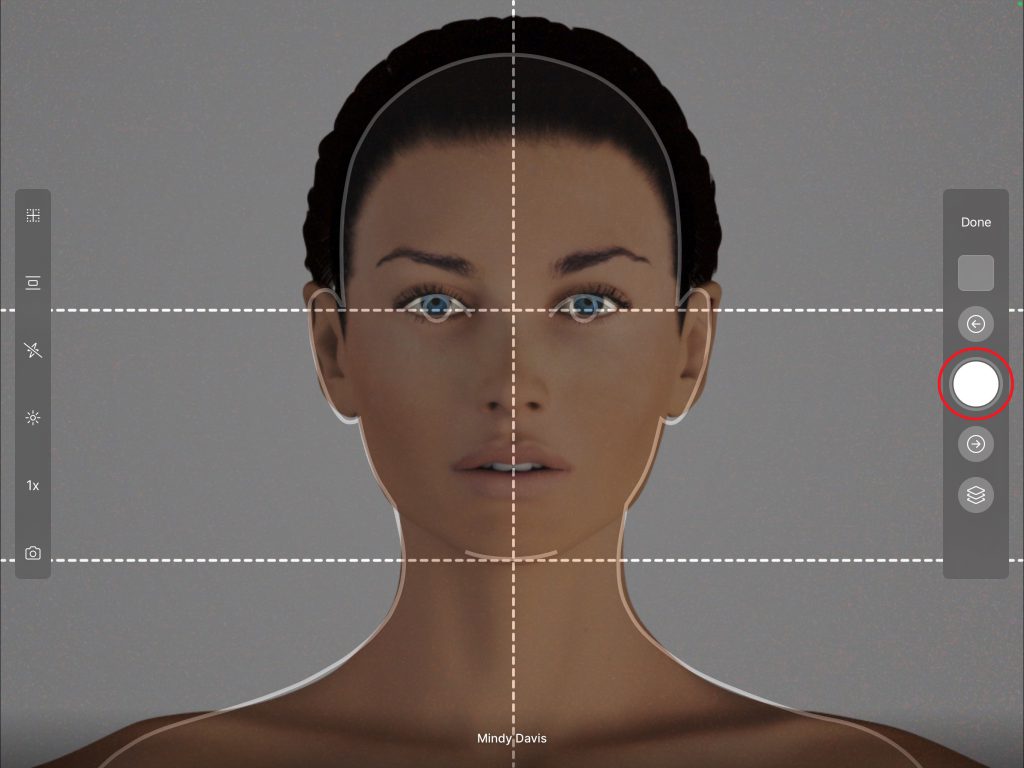
Learn how to take patient photos while using sequencing. Sequences are a series of gridlines used to create consistent photos between your before and after photo sessions. When selected a series of gridlines are superimposed on your camera view and will auto-rotate to the next gridline in the series as photos are taken.
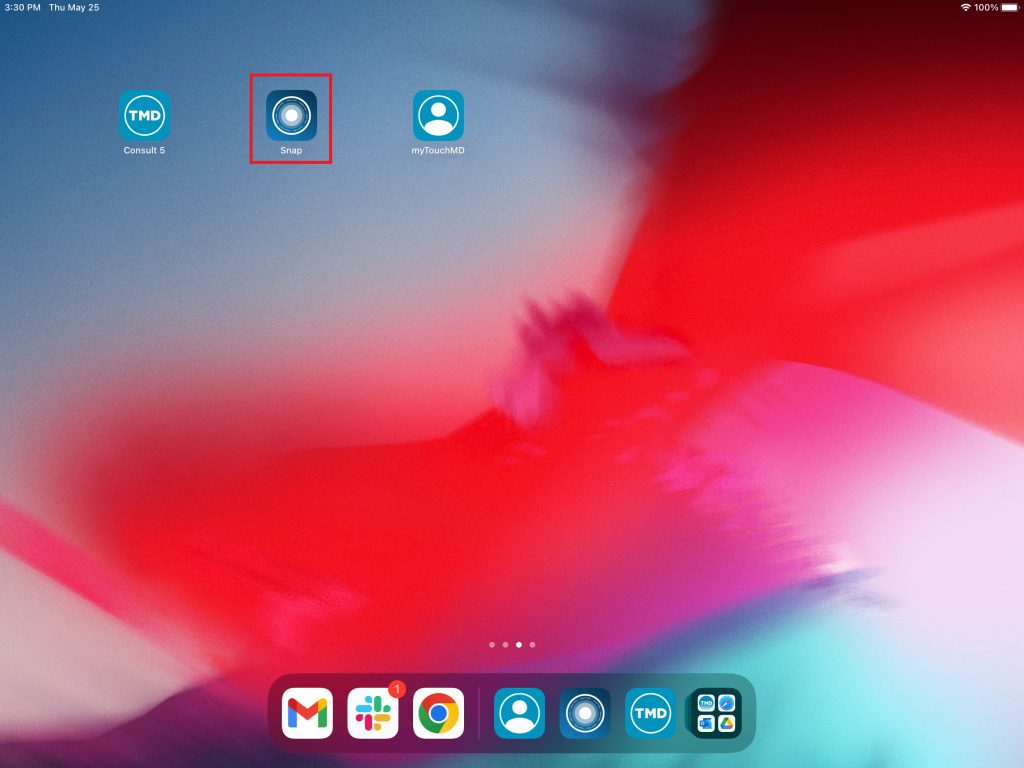
- Open the Snap app
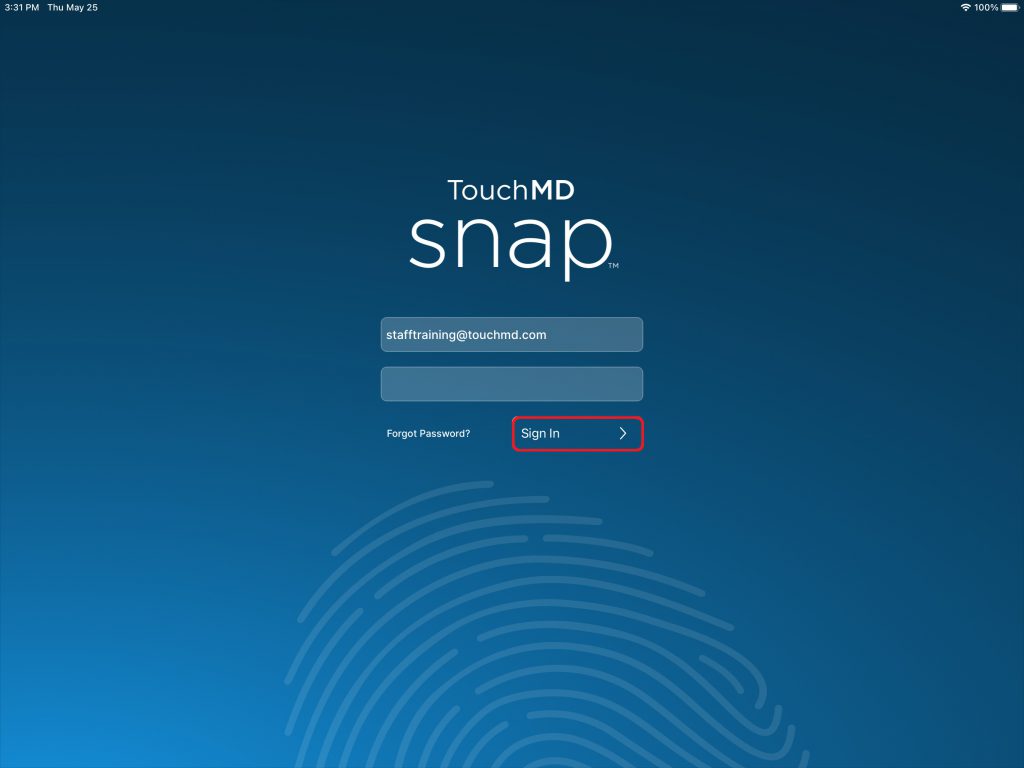
- Enter your TouchMD User credentials and select “Sign In”
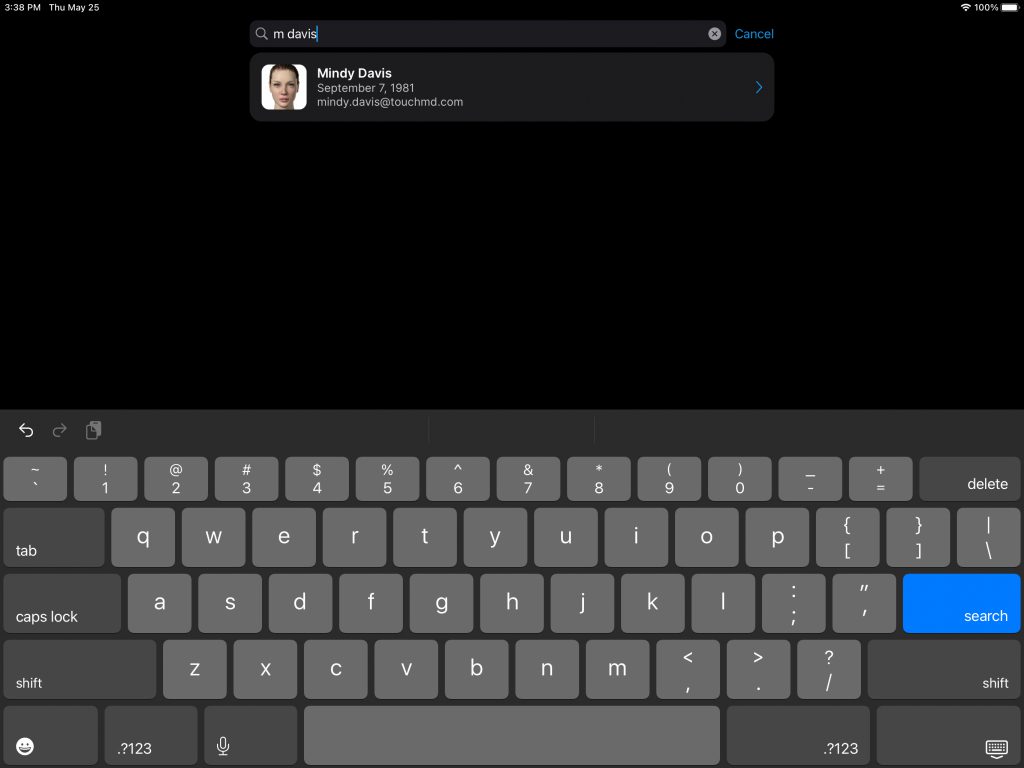
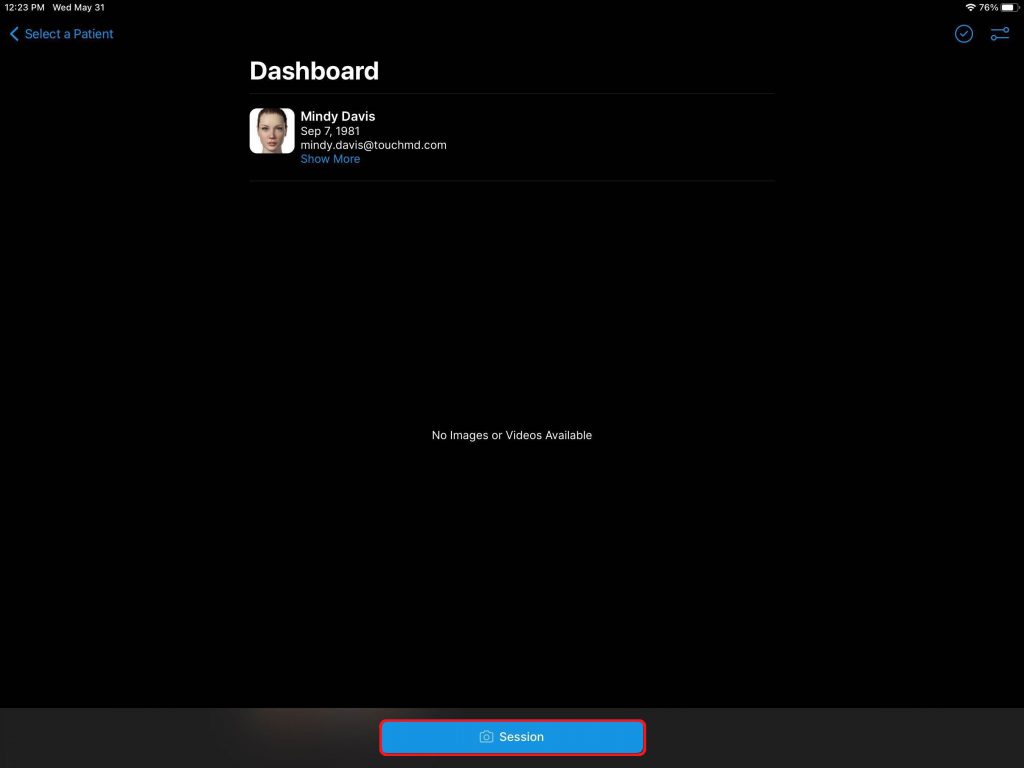
- Search for the desired patient
- Select “Session”
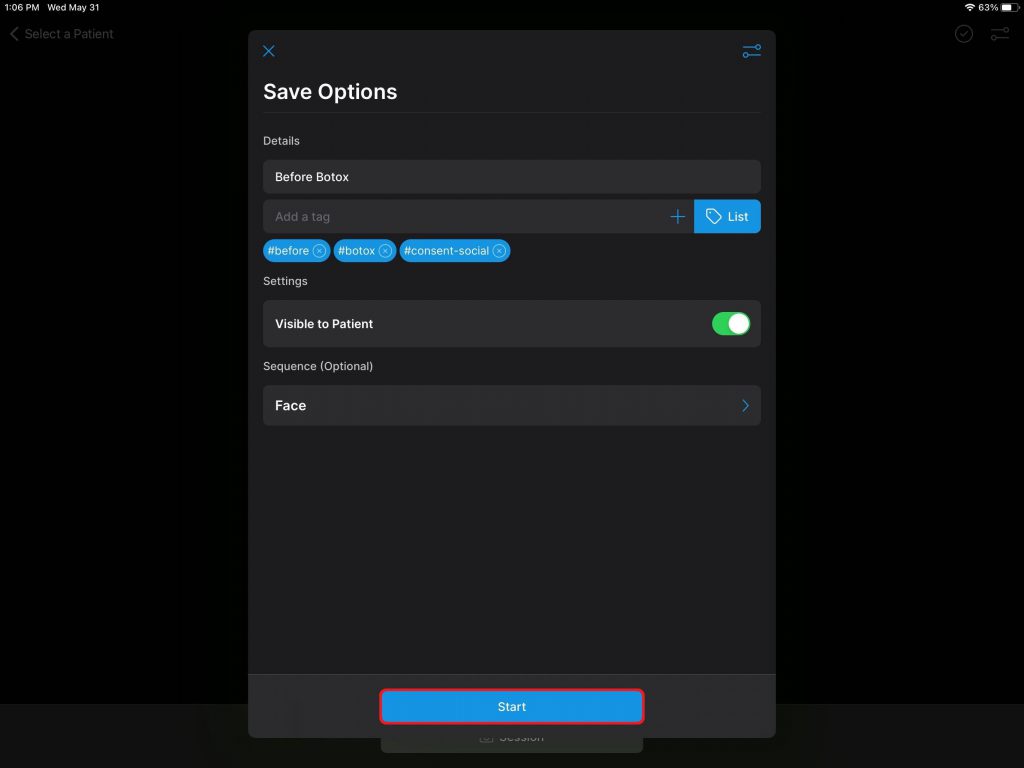
- Review Session Options and select “Start”
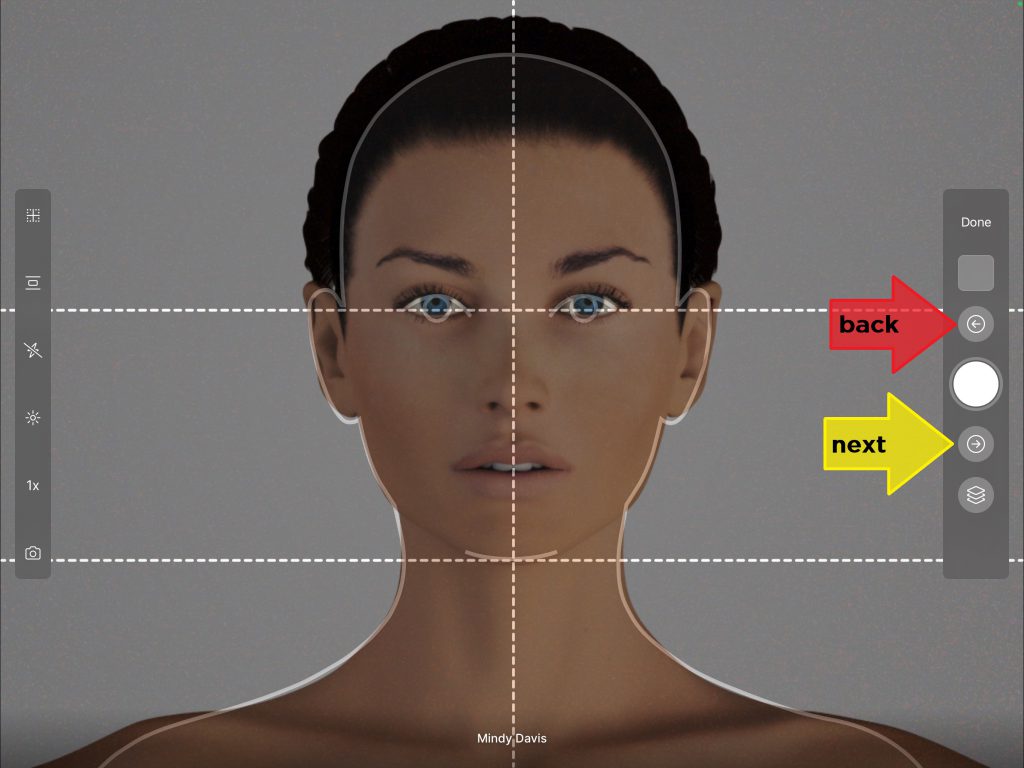
- Align the patient with the provide gridline in the sequence

- Select the on-screen shutter button
Once the photo is taken, the next gridline in the sequence will display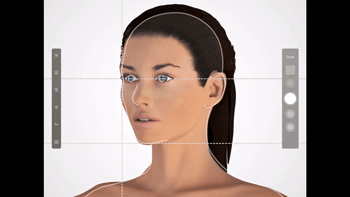
*If a particular view is not desired select the “next” arrow. If you need to retake a photo select the “back” arrow