
This article discusses a suggested flow to conduct a consult with a patient using TouchMD. Also in this article, you will find suggested “talk-tracks” to provide a few ideas of how to explain TouchMD and the benefits your patients will enjoy. Do you have other ideas? Feel free to expand beyond the ideas listed here.
Explaining and using the TouchMD technology to patients can be tricky! Here are some tips to make it easier.
For Staff Who Register Patients:

Instructions:
It is recommended that you have the TouchMD Dashboard pulled up on your computer via a Google Chrome Web browser.
- For patients who call in, register the patient over the phone via the Dashboard with the talk track below.* (Please note that additional information i.e., Consents, Recommendations, Homework may be assigned to the patient at this time via the TouchMD Dashboard or the TouchMD Consult app. Patients may review this information prior to their scheduled consultation via the myTouchMD app or patient.touchmd.com)
- For patients who walk in, register the patient via the Dashboard with the talk track below.** (Please note that additional information i.e., Consents, Recommendations, Homework may be assigned to the patient at this time via the TouchMD Dashboard or the TouchMD Consult app. Patients may review this information prior to their consultation via the Consult app on an iPad/Windows 10 Touchscreen, the myTouchMD app, or patient.touchmd.com)
Suggested Talk Tracks:
Introducing TouchMD:
*For patients who call in: “Thank you for scheduling with us! We will be using a patient education software called TouchMD during your consultation. Today you will be receiving an email in your inbox from a sender called TouchMD Messages with the title *Insert practice name here* welcomes you to myTouchMD, please read through the email and set up your password. Feel free to log into your account and take a look at the educational materials concerning our services. We will be using this software to send important information to you. Be sure to log in! Let us know if you have any questions or if you don’t see the email.”
**For patients who walk in: “Welcome to our practice! We will be using a patient education software called TouchMD during your consultation today. Today you will be receiving an email in your inbox from a sender called TouchMD Messages with the title *Insert practice name here* welcomes you to myTouchMD, please read through the email and set up your password. Feel free to log into your account and take a look at the educational materials concerning our services. We will be using this software to send important information to you. Be sure to log in! Let us know if you have any questions or if you don’t see the email.”
Installing the myTouchMD App at Check In:
Explaining TouchMD and Locating the Welcome Email: “Hi _______, let me help you install the myTouchMD app for our patient education software. We will be using this software during your consultation today and saving information in your personalized account. You should have received/will receive a Welcome Email from a sender called TouchMD Messages to set up your password. Please look at your email inbox, locate the email, and set up your password.” Installing the app: “To install the app, please open your camera app, focus on the QR code (point to the QR code), and then tap on the notification. This will bring you to your app store. Continue by installing the app.” Logging into the app: “To log into the app, enter your email address as your username and then type in the password you have just created.”
For Providers/MA/Nursing Staff/Patient Care Coordinators, etc…
Instructions:
It is recommended that the MA/Nurse/Provider/Patient Care Coordinators pull up the patient account on the TouchMD Consult app before entering the consult room. In the TouchMD Consult app and access the patient’s account. Three possible options are recommended to begin a consult:
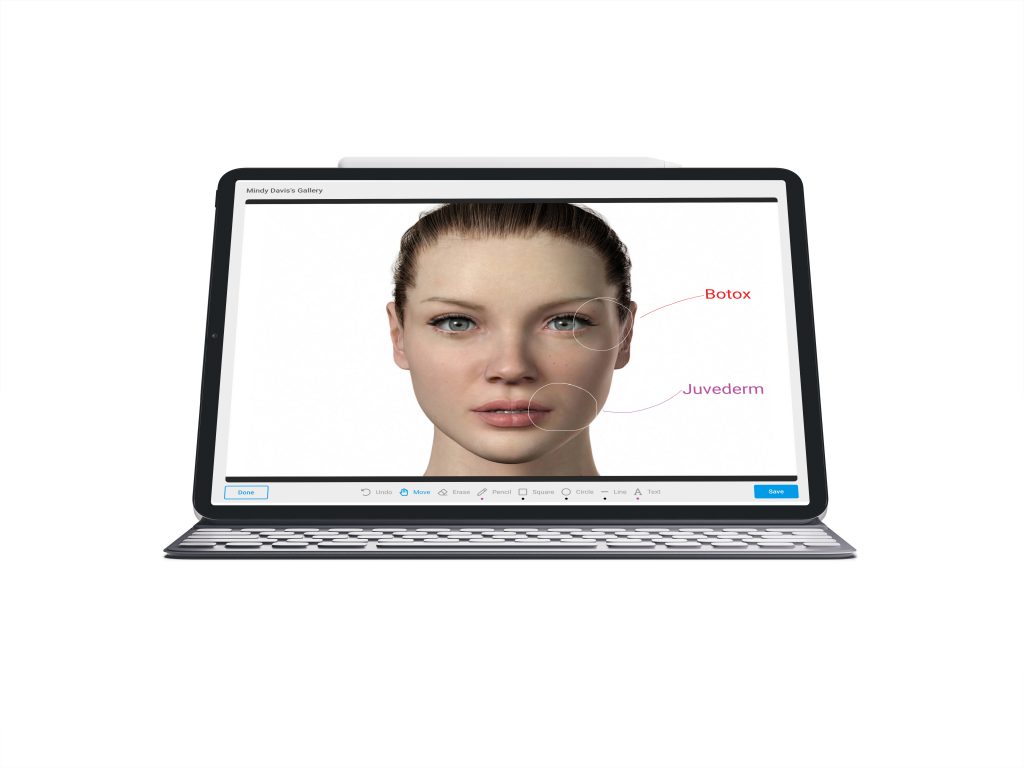
- Option 1: Take photos! Take photos utilizing the TouchMD Snap app. Utilize the shortcut in the TouchMD Consult app to access the patient’s account in the Snap app. To access the shortcut and take photos, begin in the Patient Tab in the Consult app after assessing a patient account. Tap “Gallery”, select “Snap”, and take photos of the patient. (Note that the patient photos may be taken directly in the Snap app on an iPhone/iPad) Once the photos are taken, the MA/Nurse/Provider may either show the patient the photos, draw on images, or ask the patient if they have any areas of concern (feel free to use the built-in drawing tools to mark areas of concern). (If you have not purchased TouchMD Snap, you may import photos to be used during a consultation.)
- Option 2: Educate! Using the educational materials found in the TouchMD Consult app’s Presentation tab, navigate to and talk to the patient about services that you offer, specials or in their interests. Assign Recommendations to the patient for any information of interest. (If desired, you can leave an iPad in the room with the patient and let them explore TouchMD)
- Option 3: Start Playlist! Using Playlist, allow the patient to view your practice Playlist. Be sure to gather Interests and make Recommendations!
Suggested Talk Tracks:
Introducing Different Features of TouchMD:
- Intro: “I am going to access your patient account in our patient education system called TouchMD. We will be saving information into your account. You will be able to access this at home via the myTouchMD patient app or website. At the end of your visit today, we will show you how to download the app or navigate to the website so you may log in. Be sure to log in, as it houses valuable information for you.”
- Taking/Uploading Photos: “The photos that we are taking today will be uploaded into your myTouchMD account. They will be listed on your myTouchMD Timeline under ‘Gallery’. Be sure to log in and take a look.”
- Drawing on photos: “I am going to save this drawing into your myTouchMD account. It will be saved in your myTouchMDTimeline under ‘Gallery’.”
- Recommendations: “ I am going to highlight/recommend this information about _____ for you. You will find this information in your myTouchMD Timeline and it will be listed as “We Recommend”. Feel free to explore this information, ask us questions and to also show it to your family and friends.”
- Consents: “I am going to save this completed/assigned consent into your account. It will be saved in your myTouchMD Timeline under ‘Consents’.” Additional Information For patients who need to complete a consent via the myTouchMD app or patient.touchmd.com: “Please review, fill out the required fields, sign, and select ‘Complete’ at the bottom of the consent. It is important that this is complete as soon as possible”
- Homework: “I am going to save this ______ (homework) into your account. It will be saved in your Timeline.under ‘Please Review’. This information is important to review. Please review as soon as possible”
- Playlist: Starting Playlist: “I am going to start a series of videos about the different products/services/surgeries offered in our practice. When I step back into the room we will have a discussion about any of your interests.” Capturing Interests: “Did you see any services/products/surgeries of interest? Would you like to learn more? Let’s schedule an additional appointment.”
Installing the myTouchMD App at Check Out/End of Patient Consult:
Explaining TouchMD and Locating the Welcome Email: “Hi _______, let me help you install the myTouchMD app for our patient education software. We will be using this software during your consultation today and saving information in your personalized account. You should have received/will receive a Welcome Email from a sender called TouchMD Messages to set up your password. Please look at your email inbox, locate the email, and set up your password.” Installing the app: “To install the app, please open your camera app, focus on the QR code (point to the QR code), and then tap on the notification. This will bring you to your app store. Continue by installing the app.” Logging into the app: “To log into the app, enter your email address as your username and then type in the password you have just created.”